
Overview #
You’re only a few steps away from setting up your store locator.
In this guide, we’ll walk through the essential setup: creating the filters customers can use to find your store locations, adding your store locations, connecting Google Maps, and publishing the store locator on your BigCommerce website.
You don’t need to customize everything right away. Once your store locator is up and running, you can always return to eLocate to add more locations or explore additional features.
Step 1 — Create Your Global Filters #
Start by creating the filter categories and values customers can use to narrow their search.
For example, you might create:
- Services — Installation, Repair, Delivery
- Certifications — Certified Installer, Licensed Contractor
- Business Type — Retailer, Showroom, Service Center
In eLocate, open Global Filters and create the categories and values that apply to your business.
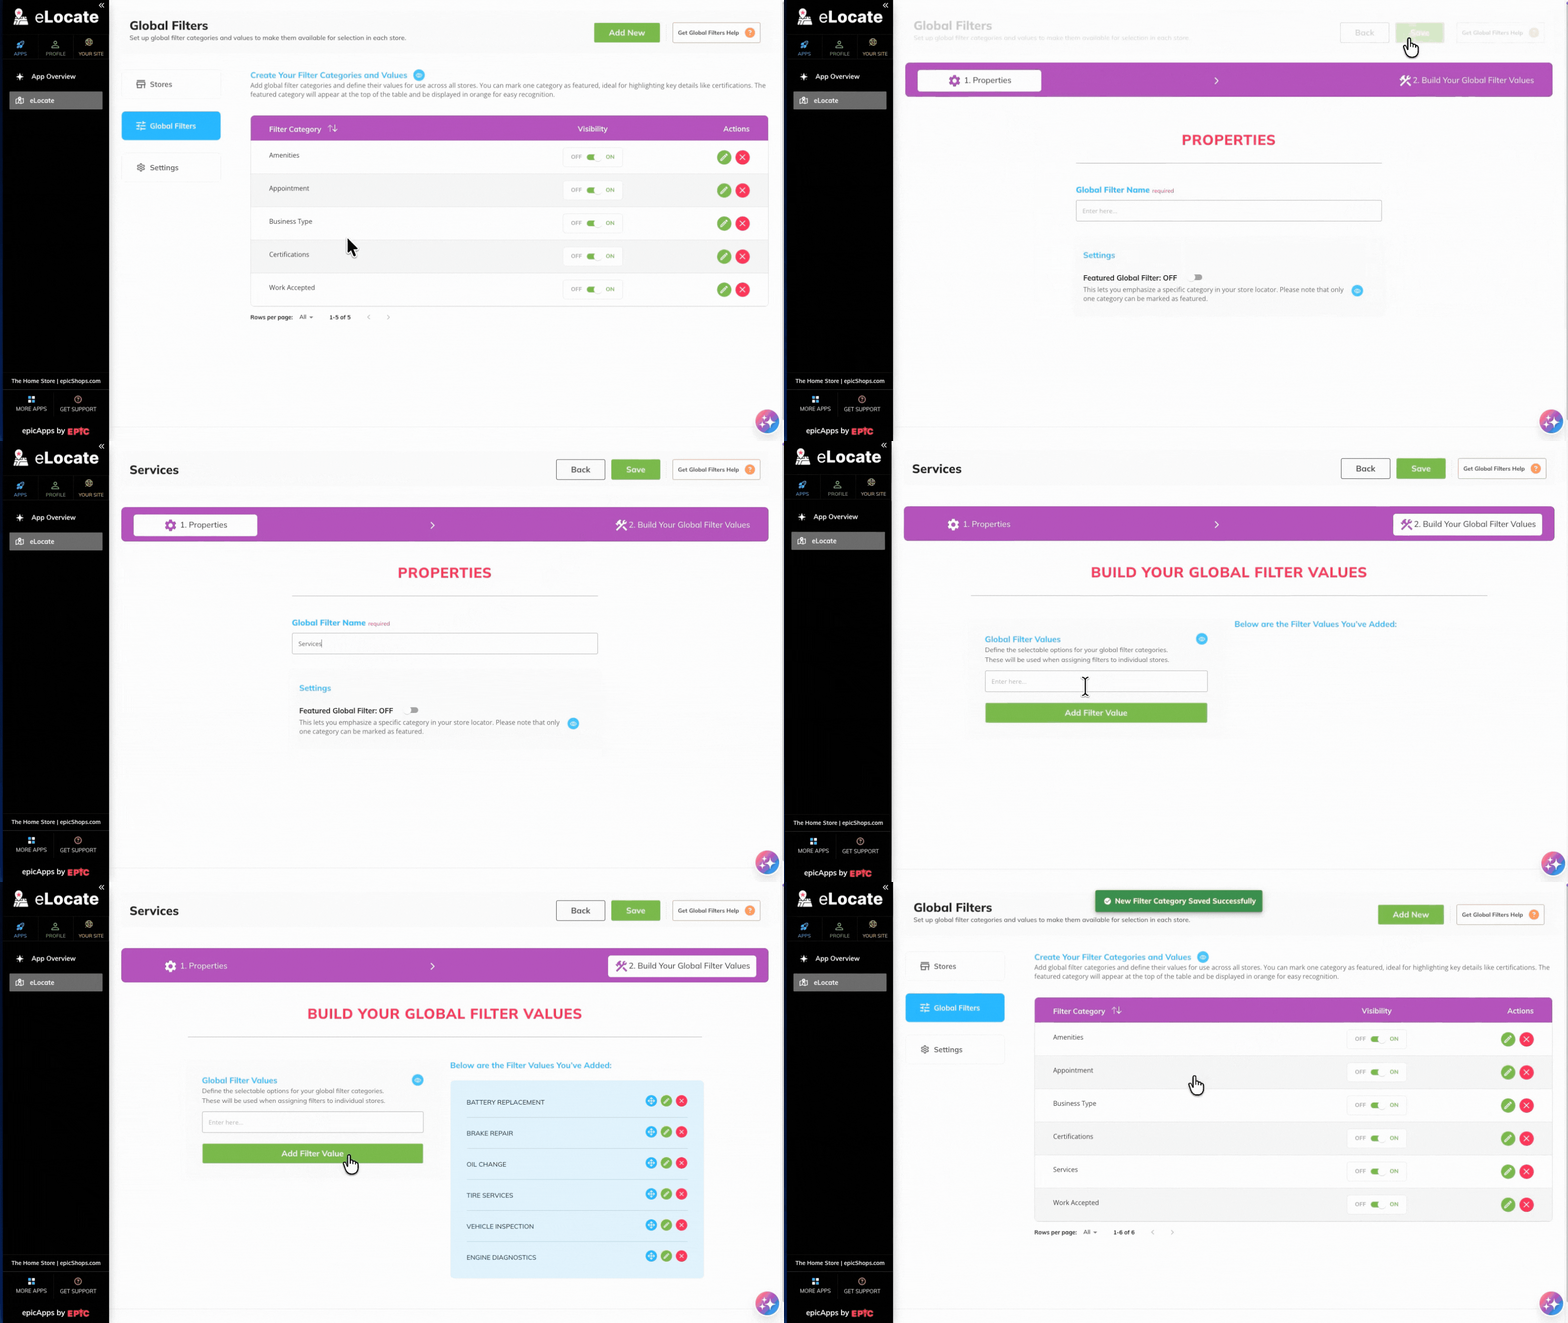
Learn more: Global Filters
Step 2 — Add Your Store Locations #
Once your Global Filters are ready, add your store locations.
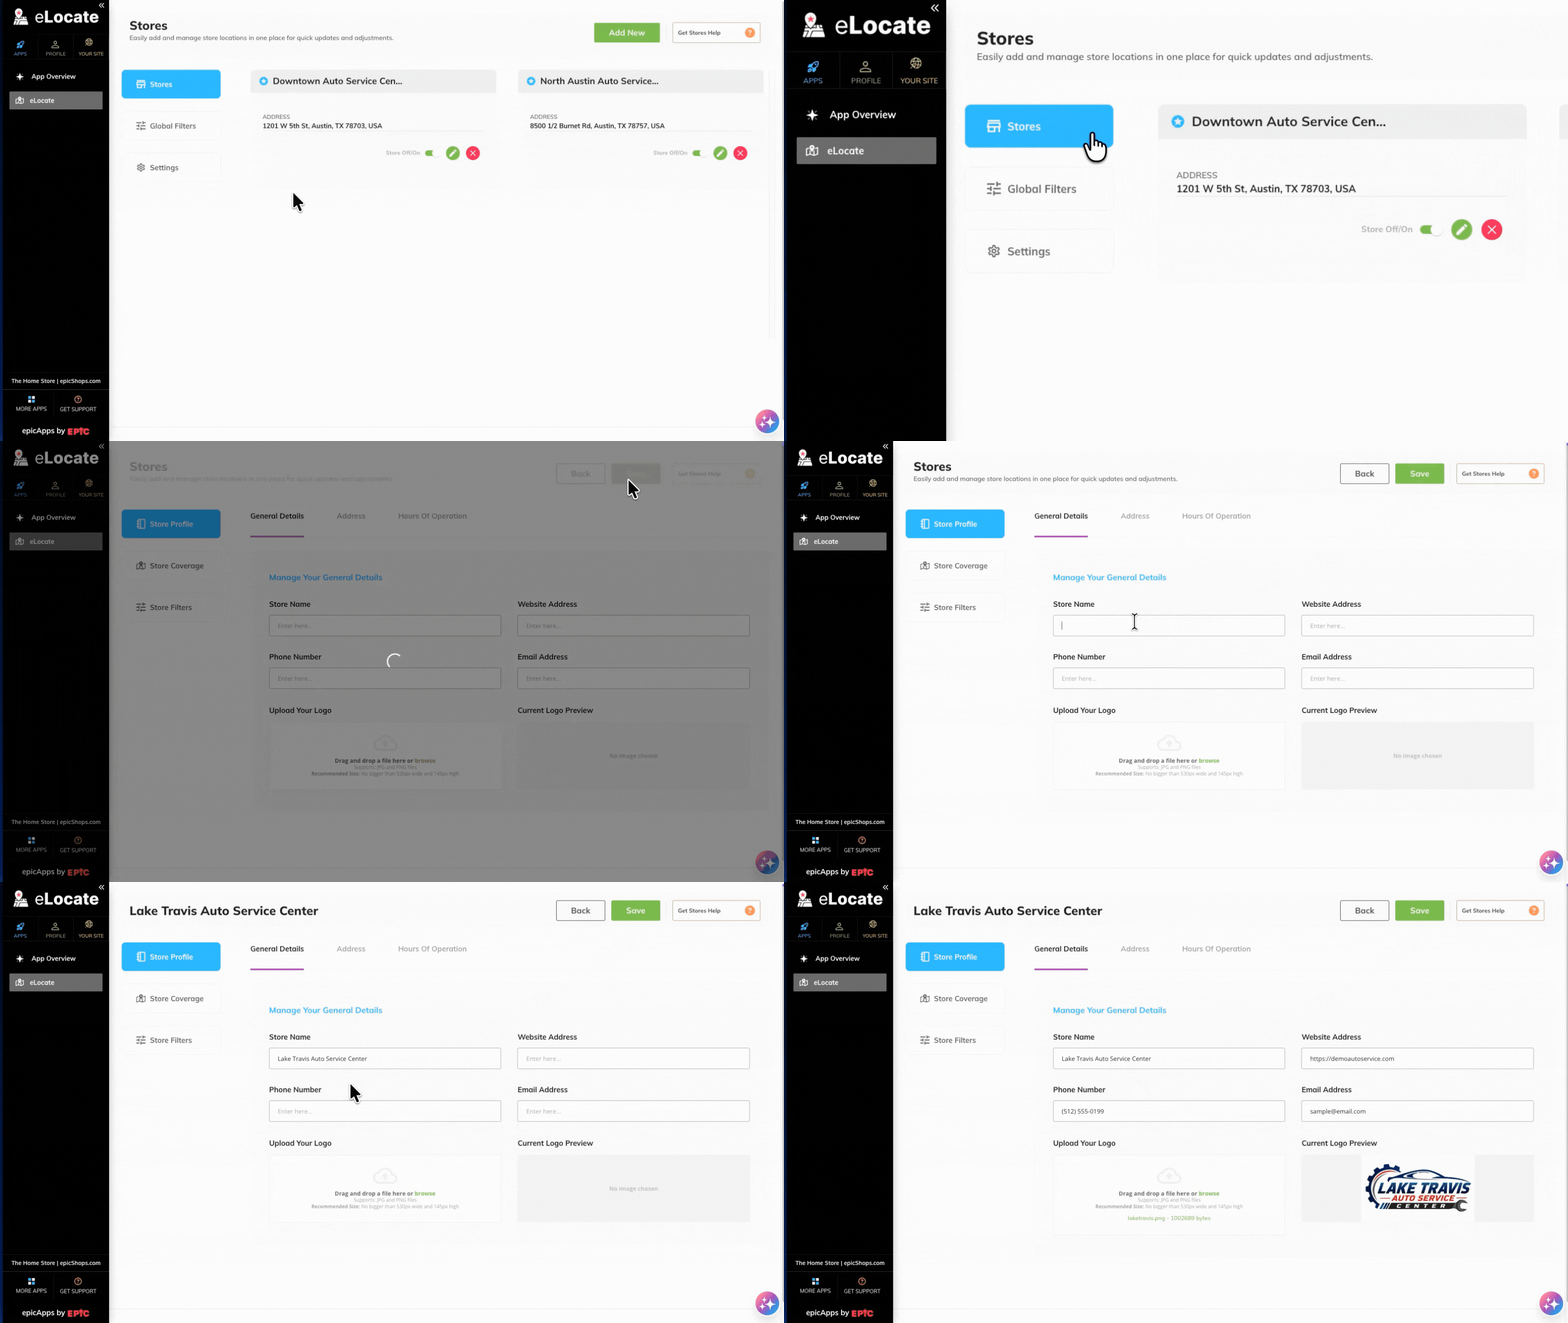
Open Stores → Add New and complete the following:
Store Profile #
General Details #
Enter the basic information for the store location, including its name, website, contact number, and contact email.
Address #
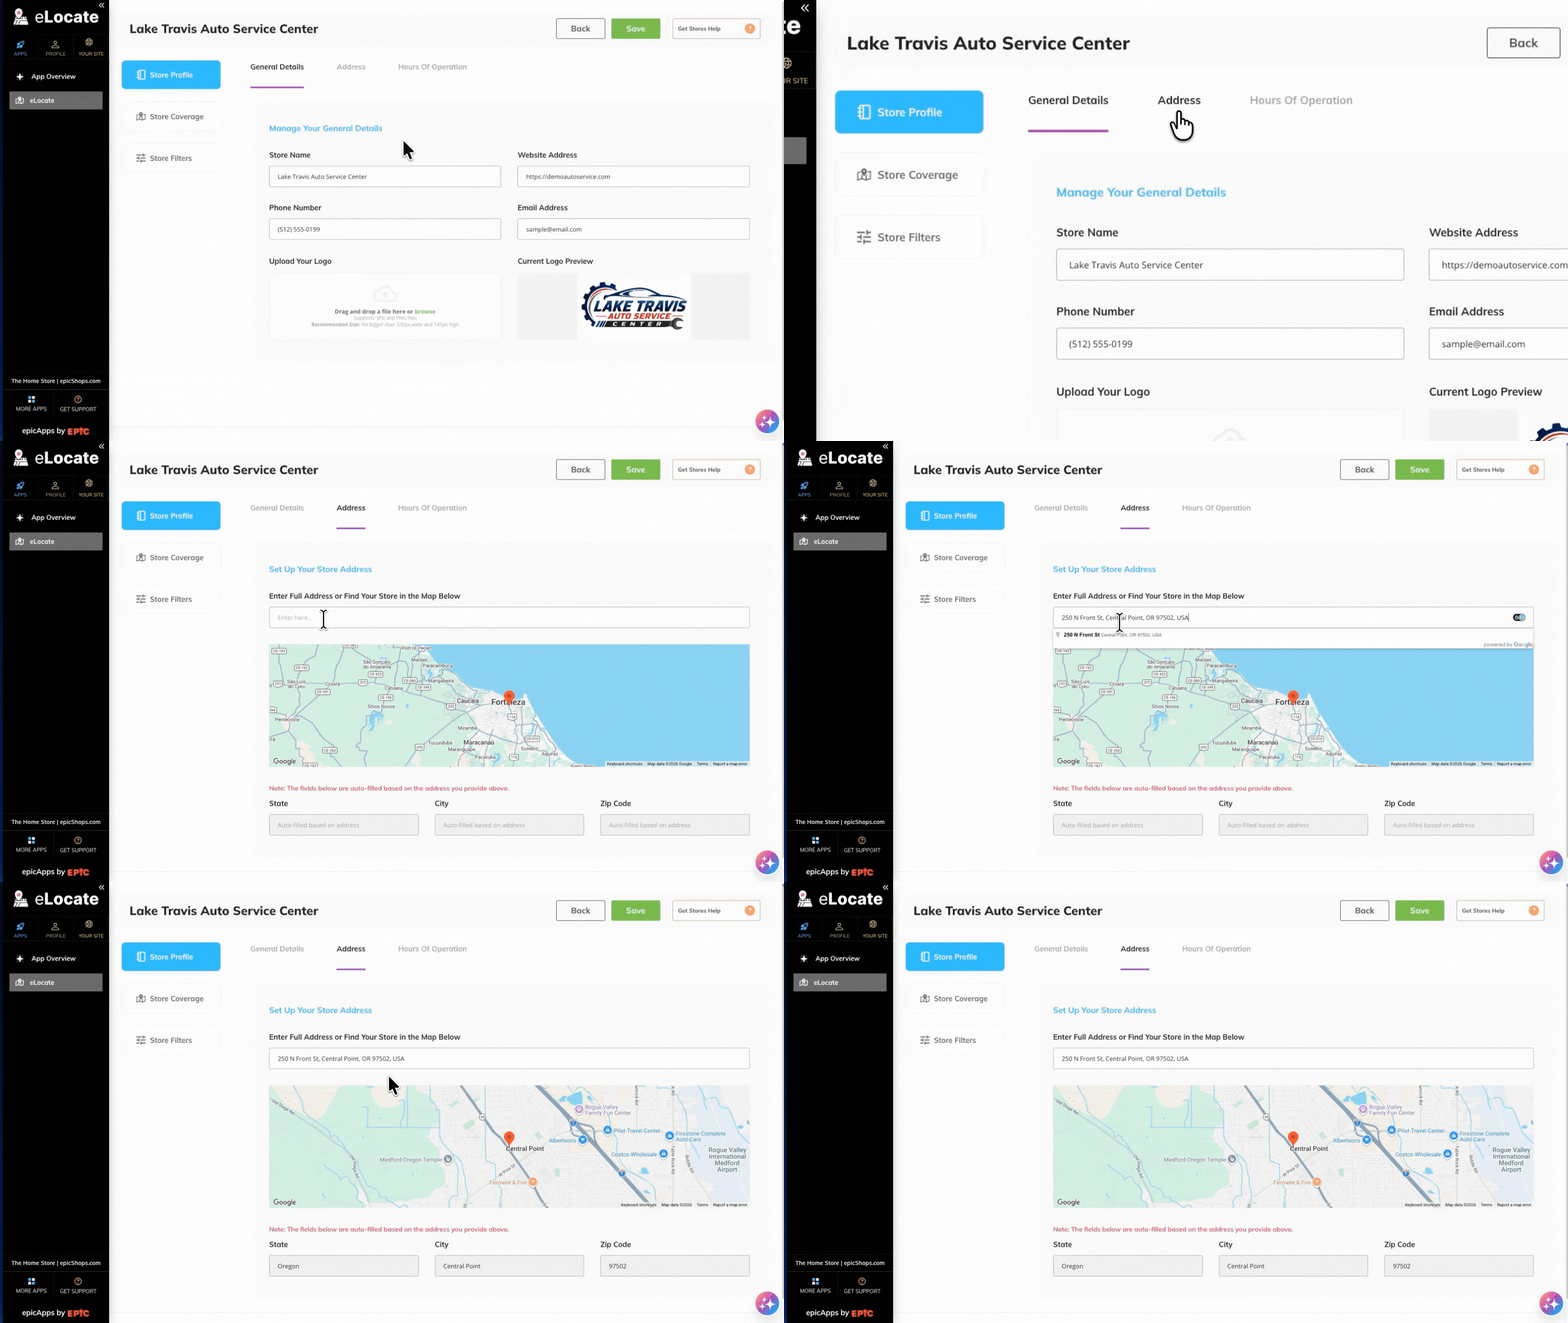
Click Address in the Store Profile menu.
- Enter the store’s address.
- Select the matching address from the search results.
- eLocate automatically fills in the State, City, and ZIP Code based on the address you selected.
- Review the address details to make sure they’re correct.
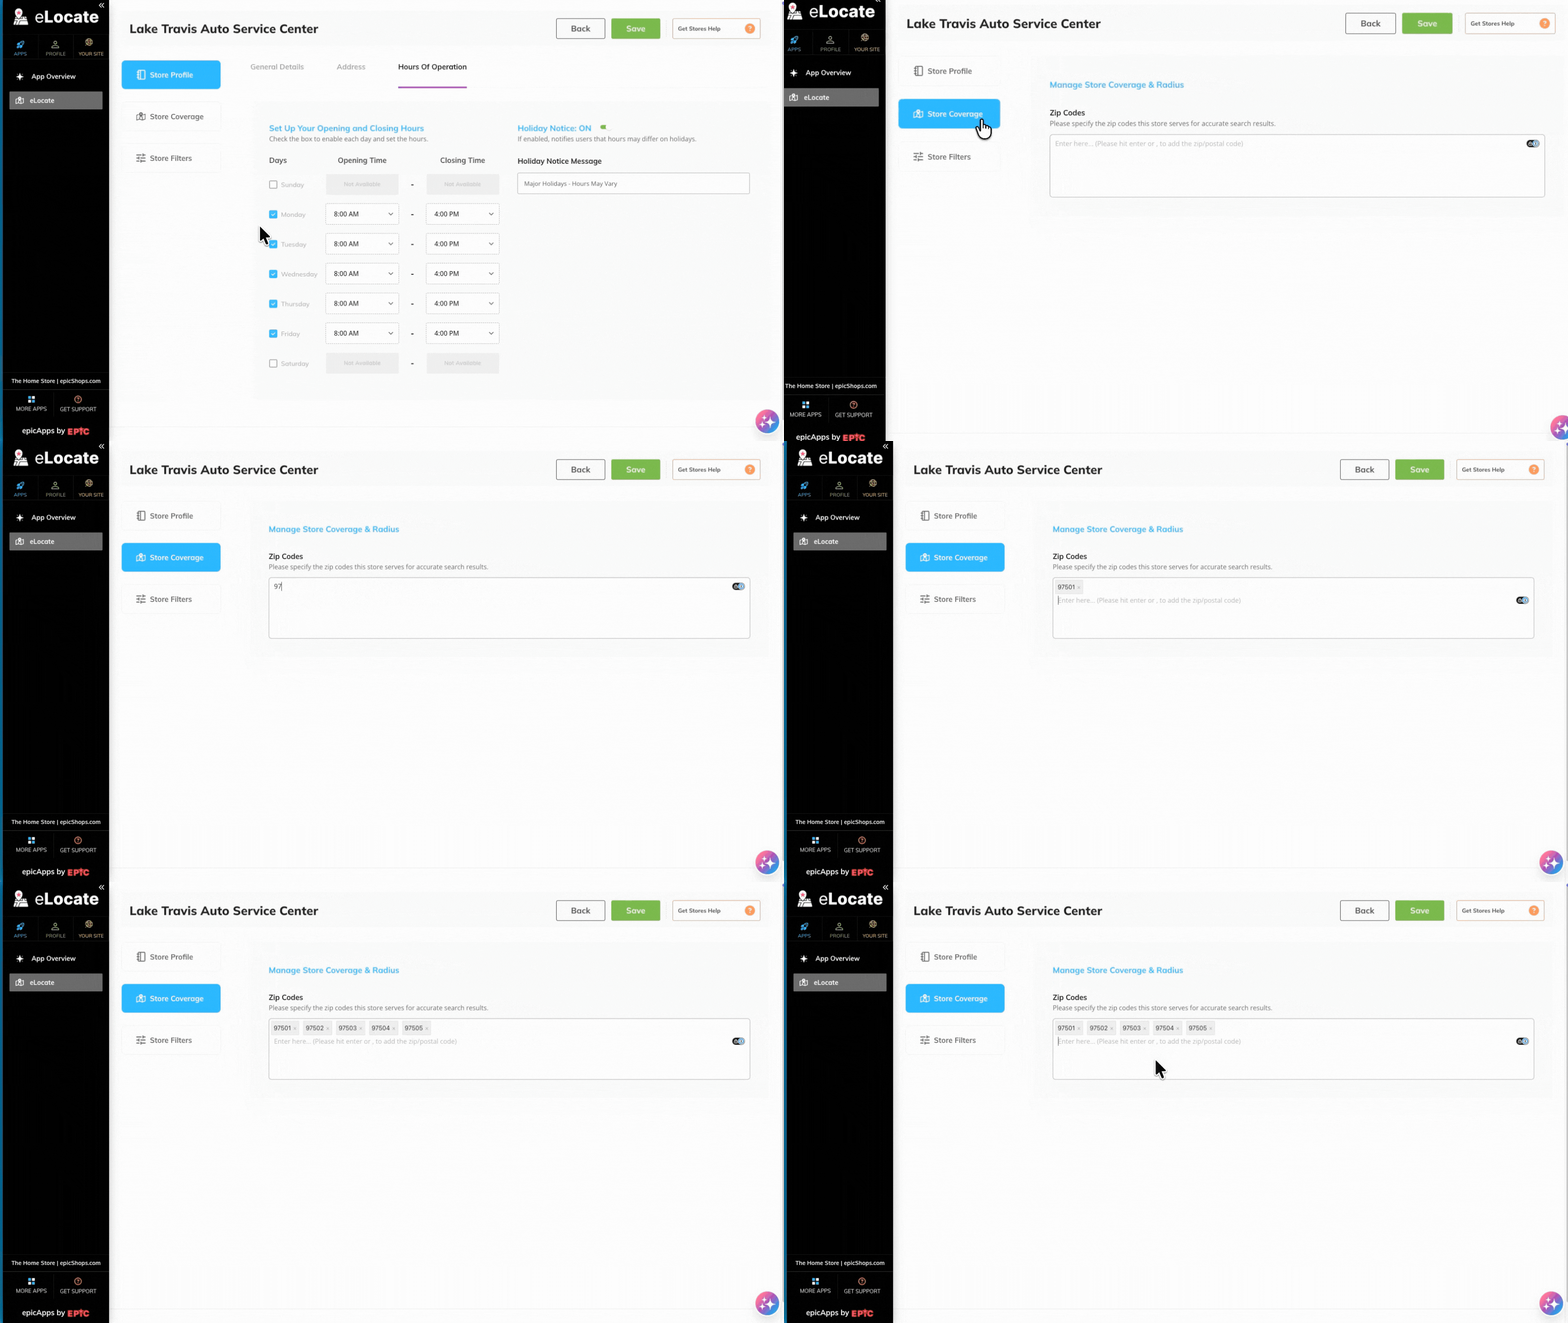
Hours of Operation #
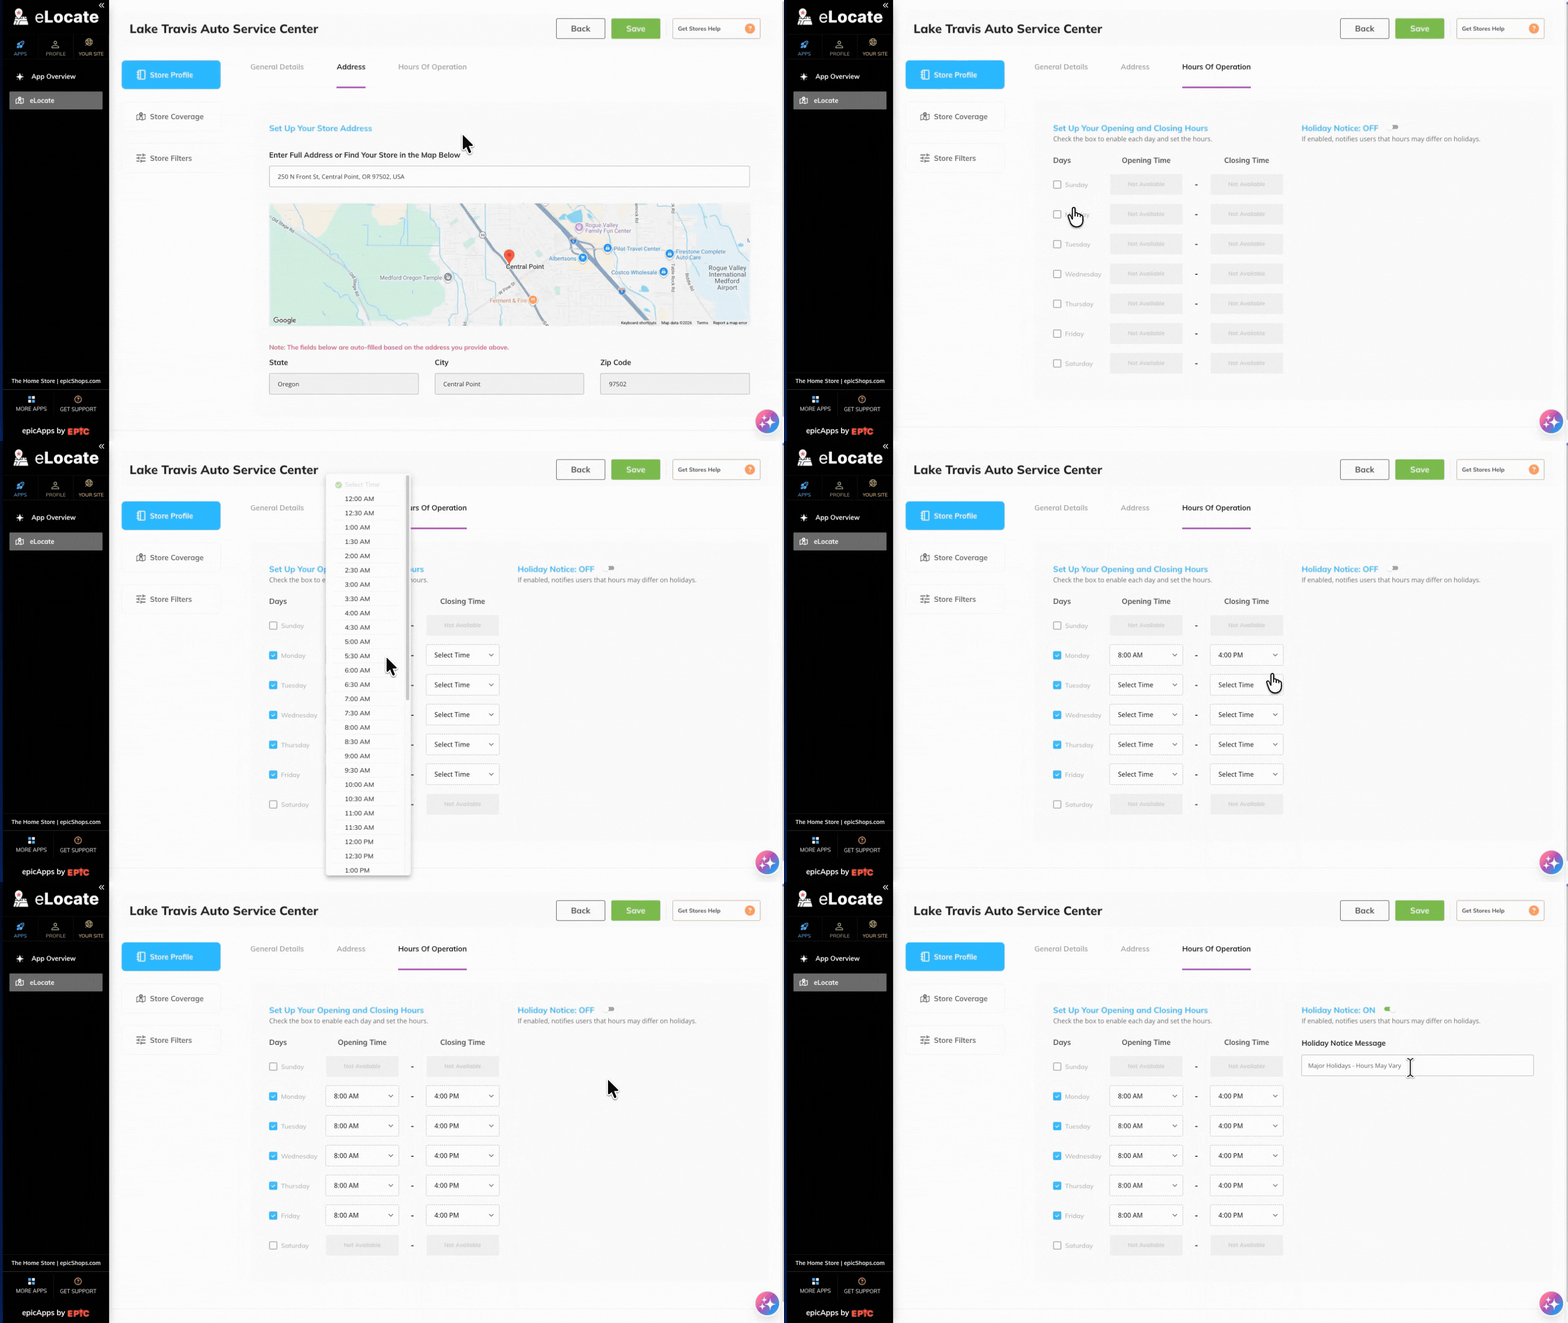
Click Hours of Operation in the Store Profile menu.
- Select the days the store is open.
- Select the Opening Time and Closing Time for each day using the dropdown fields.
- Leave a day unchecked if the store is closed on that day. Unchecked days won’t appear as open in your store locator.
- To add a holiday notice, turn on the Holiday Notice toggle and enter the message you’d like customers to see.
When you’re finished, click Store Coverage in the menu to continue.
Store Coverage #
Add the ZIP Codes served by this store.
- Enter a ZIP Code in the ZIP Codes field.
- Press Enter or add a comma to add the ZIP Code.
- Repeat for each ZIP Code this store serves.
When you’re finished, click Store Filters in the menu to continue.
Store Filters #
Apply the filter values you created in Step 1 to this store.
- Open Store Filters.
- Select the filter category you want to assign to the store.
- Select the appropriate values for the store.
- Click Save in the Store Filters pop-up.
- Turn off any filters that don’t apply to this store.
- When you’re finished, click Save in the upper-right corner to save the store location.
Your store location will appear on the Stores page after it’s saved.
If you have multiple store locations, repeat these steps for each one.

Step 3 — Add Your Google Maps API Key #
Connect eLocate to Google Maps so your store locator can display maps and accurate location information.
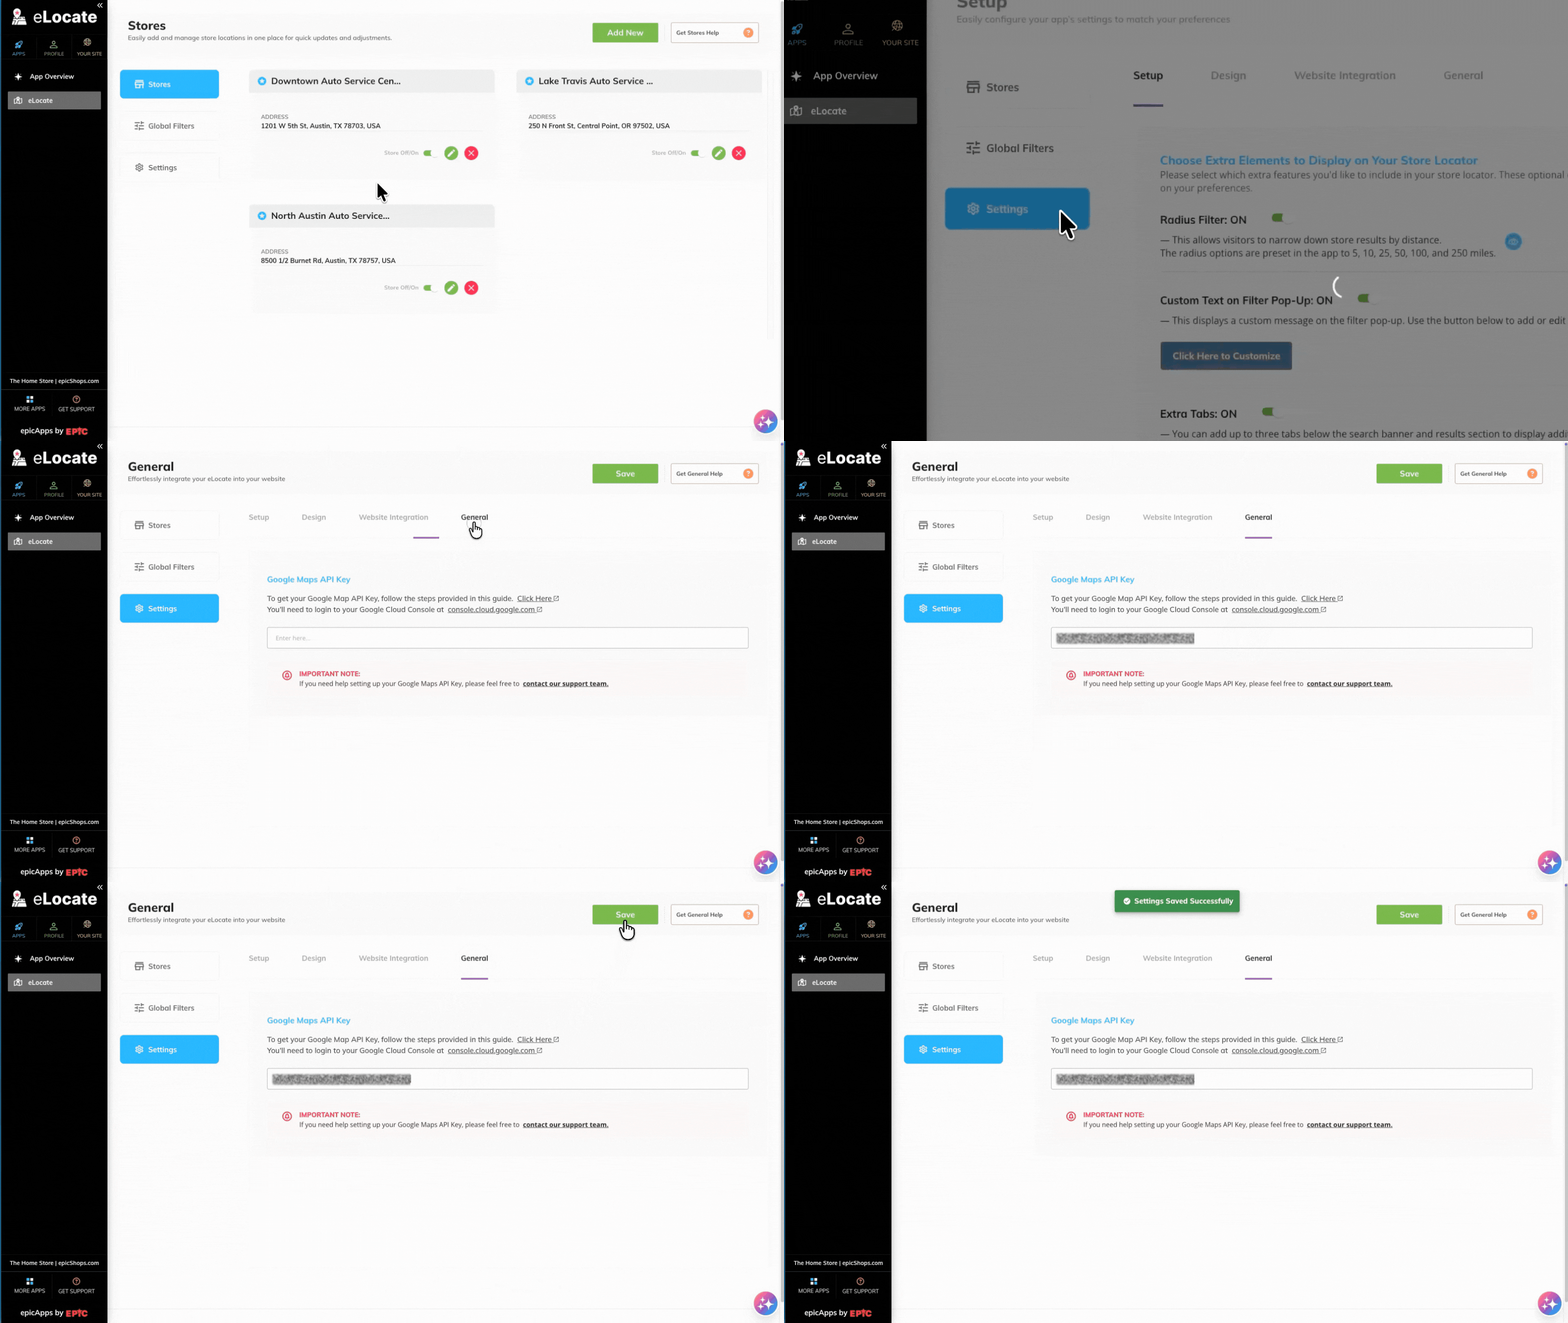
Open Settings → General.
- Sign in to your Google Cloud Console.
- Open the Google Maps API Key Guide, or click the Click Here link in eLocate.
- Follow the guide to generate your Google Maps API key.
- Copy your API key and paste it into the Google Maps API Key field in eLocate.
- Click Save.
Learn more: Google Maps API Key
Step 4 — Publish Your Store Locator #
Once your store information and Google Maps are ready, publish your store locator on your BigCommerce website.
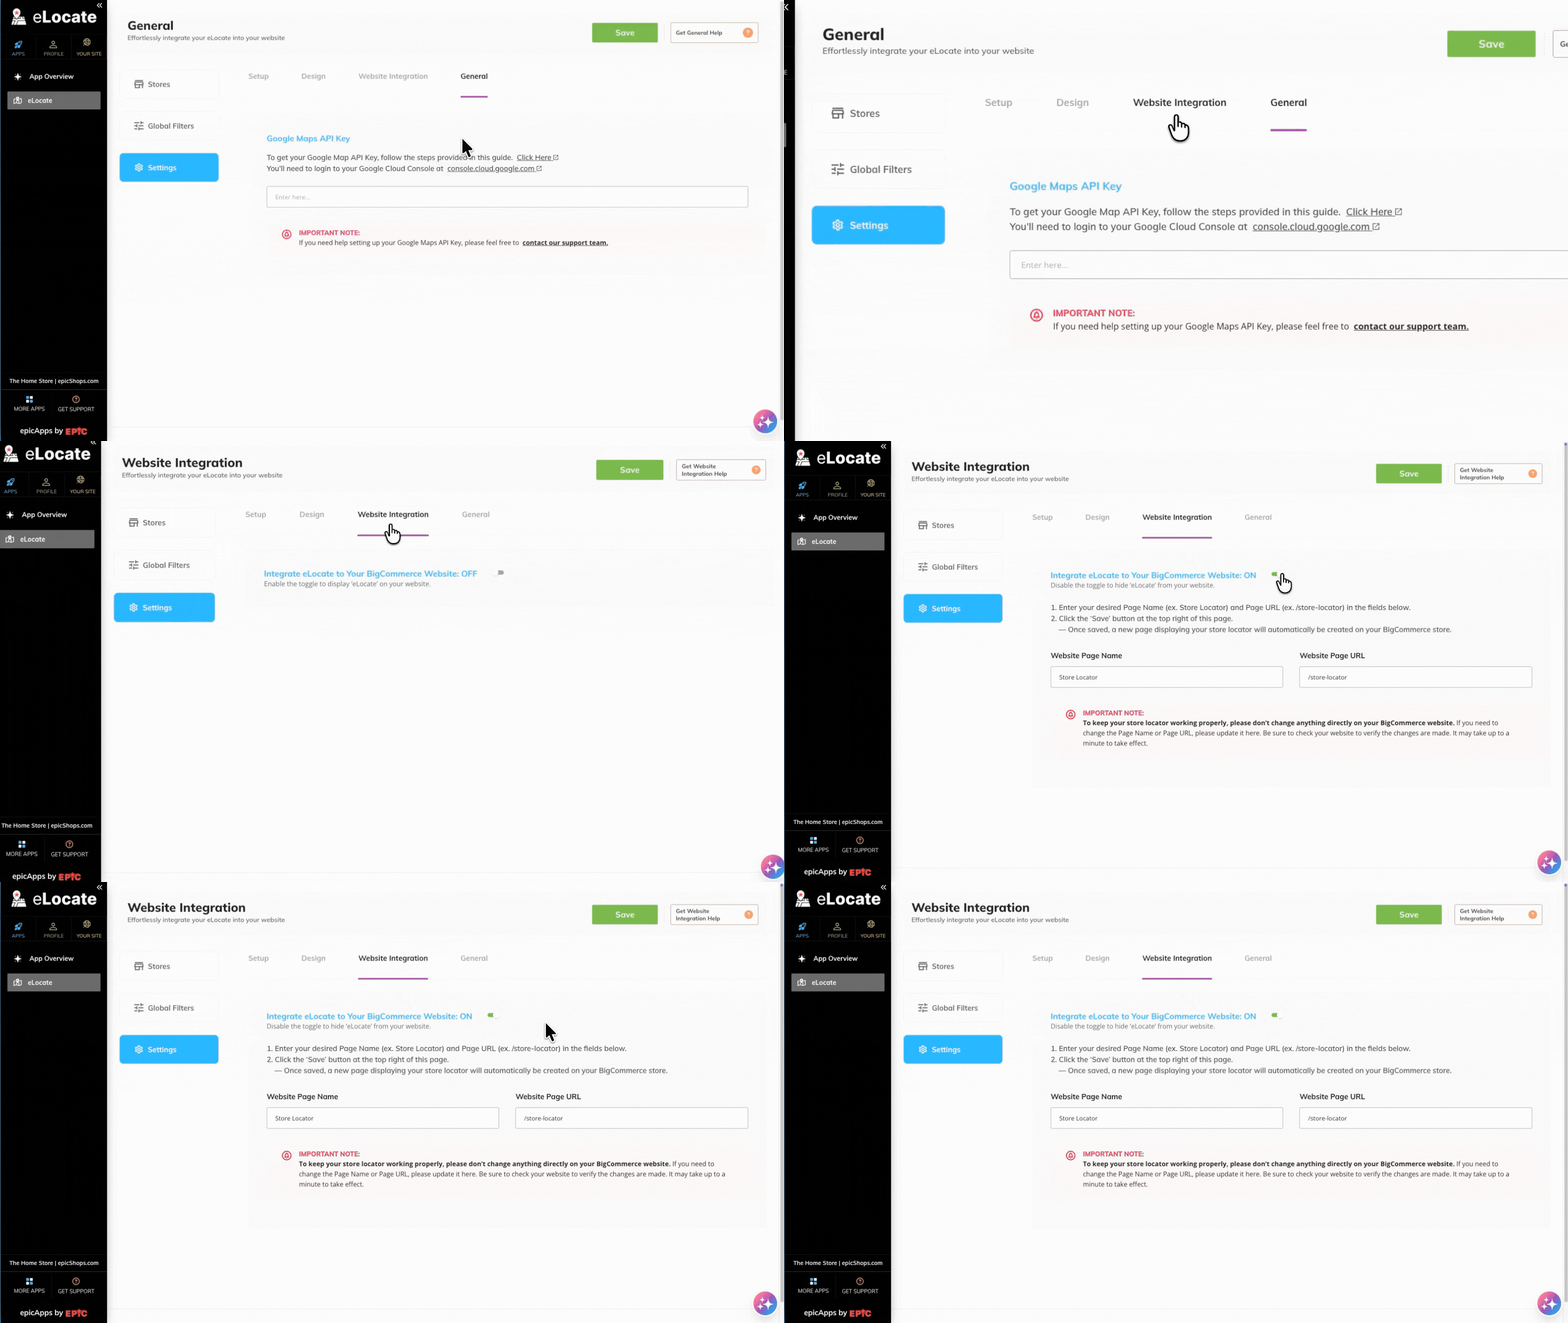
Open Settings → Website Integration.
- Turn the Integrate eLocate to Your BigCommerce Website toggle On.
- Enter your Website Page Name.
- Enter your Website Page URL.
- When you’re finished, click Save.
eLocate automatically creates a new store locator page on your BigCommerce website using the page name and URL you entered.
Visit your website to verify that your store locator page is available.
- To keep your store locator working properly, don’t make changes to the store locator page directly in BigCommerce.
- If you need to update the Website Page Name or Website Page URL, make the changes from the eLocate app.
- Changes may take up to one minute to appear on your website.
Learn more: Website Integration
Explore More Features #
Once your store locator is up and running, you can explore additional features to make it more useful for your customers.
| Feature | What it helps you do |
|---|---|
| Setup | Add features such as the Radius Filter, Custom Text on Filter Pop-up, and Extra Tabs. |
| Design | Customize your store locator’s colors and Search Header. |
| Manage Stores | Update, disable, or remove store locations as your business changes. |
| Manage Global Filters | Update, feature, disable, or reorder your filter categories and values. |
Each of these features is optional, so you can come back and explore them whenever you’re ready.
What’s Next? #
Great! Your store locator is ready to go.
Next, let’s take a look at what your customers will experience when they use your store locator.


