
Now that popCards is installed, you’re ready to create your first Pop Card.
This walkthrough focuses on the essential setup steps so you can quickly launch your first Pop Card on your storefront.
Step 1 — Create a New Pop Card #
From the Pop Cards List View page:
1. Click the Add New button.
2. In the “Add New Pop Card” window, choose what you want to create:
- Quick Message
- Opt-In (Collect Email)
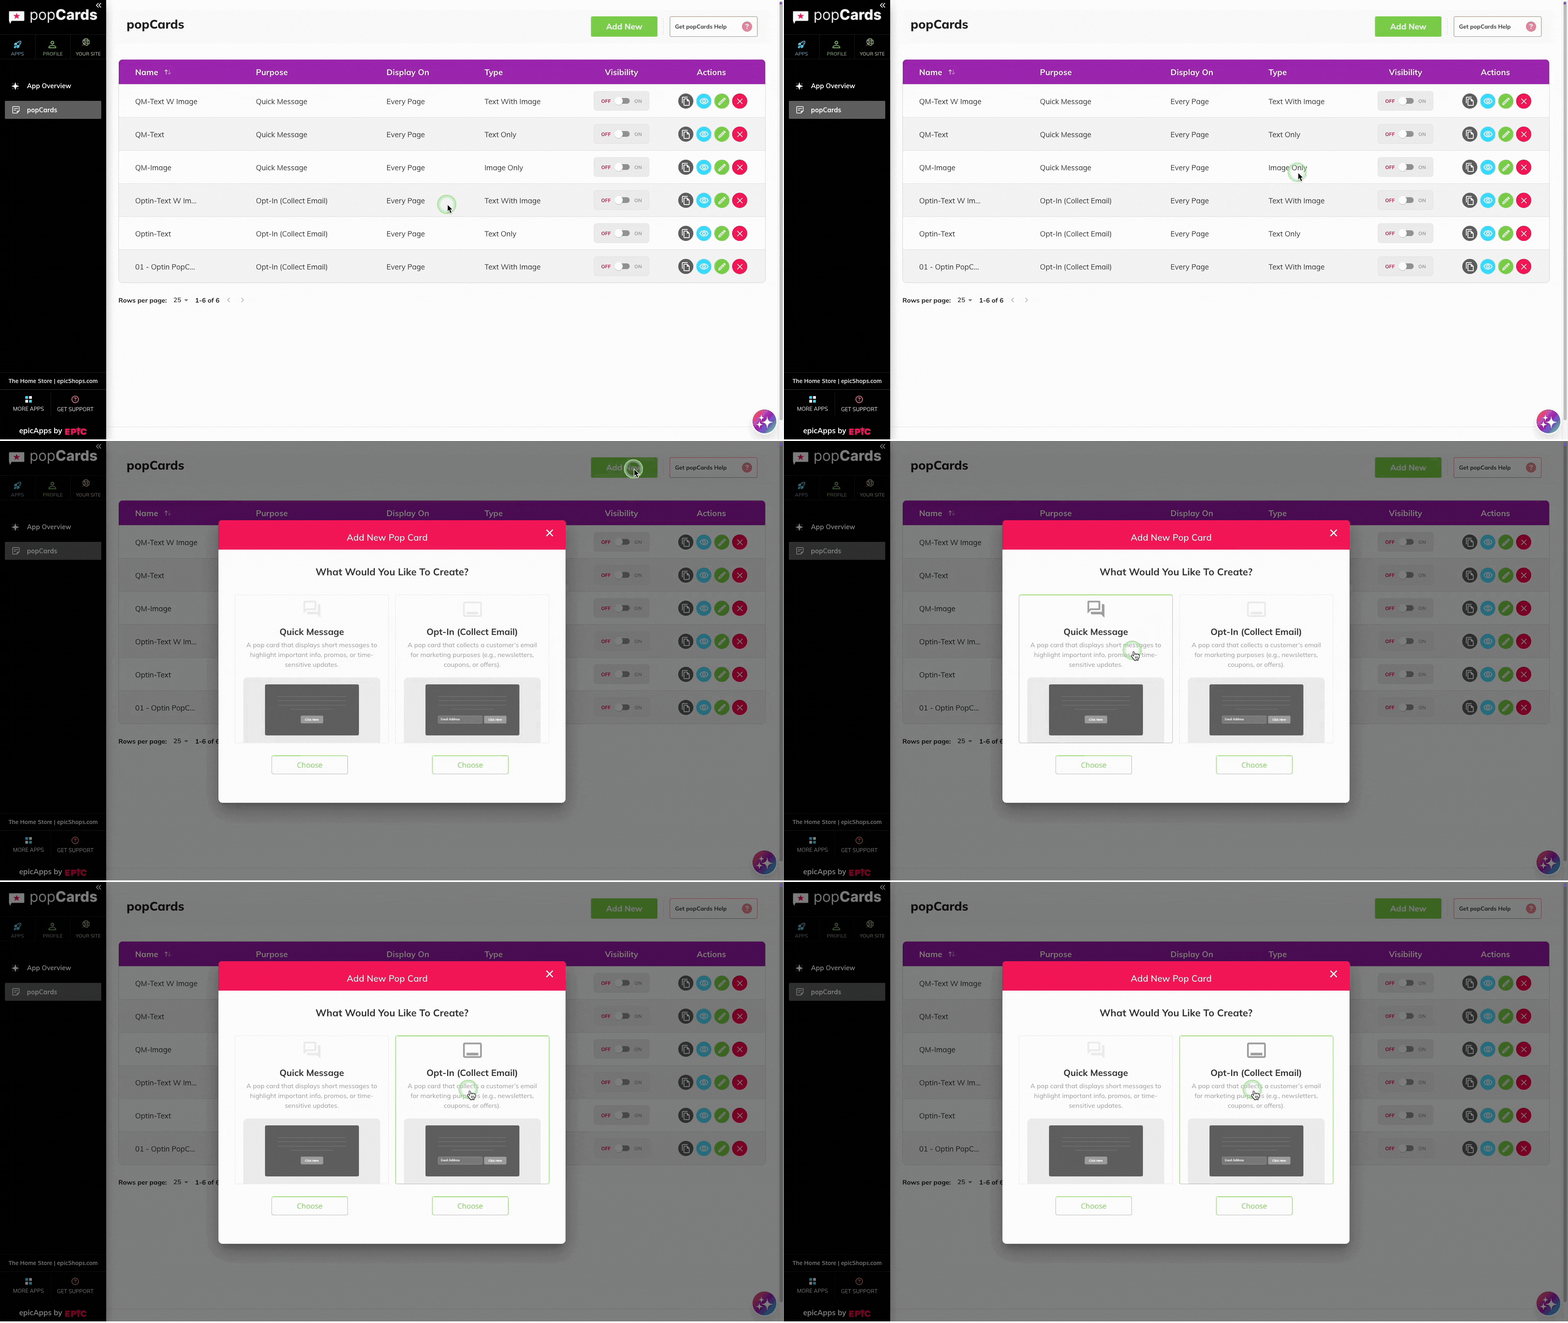
Choose the Right Pop Card Type #
Quick Message #
Best for:
- promoting sales or discounts
- sharing announcements or updates
- directing customers to products or landing pages
Opt-In (Collect Email) #
Best for:
- growing your email list
- collecting customer signups
- offering discounts or incentives in exchange for subscriptions
Step 2 — Set Up Basic Pop Card Details #
After choosing your Pop Card type, you’ll be taken to the Create a New Pop Card screen.
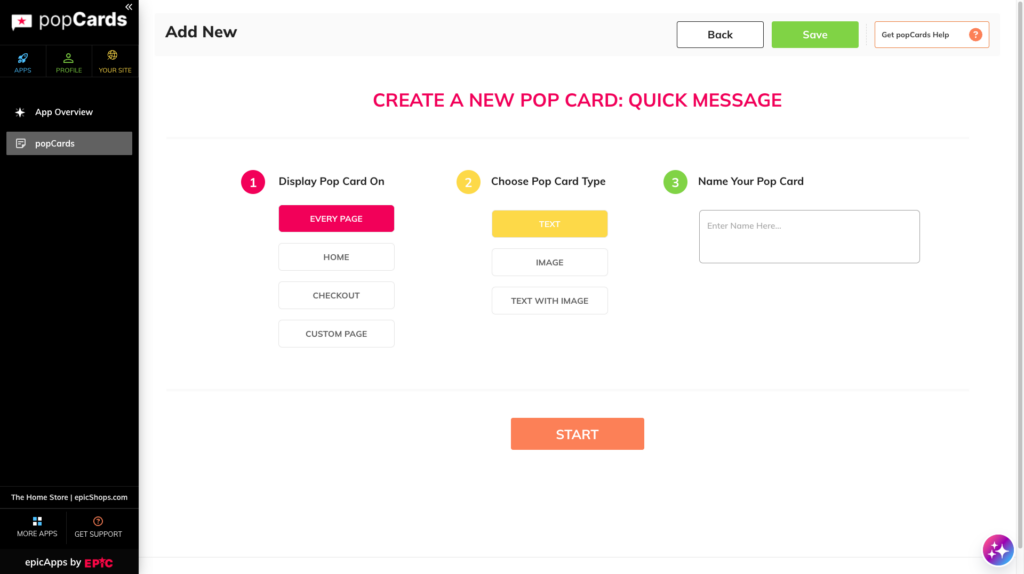
Choose Where to Display Your Pop Card #
Under Display Pop Card/Opt-in On, choose where your Pop Card should appear:
- Every Page
- Home
- Checkout
- Custom Page
Select Your Pop Card Layout #
Choose the format that best fits your goal.
Quick Message layouts #
- Text
- Image
- Text with Image
Opt-In layouts #
- Text
- Text with Image
Name Your Pop Card #
Enter a descriptive name in the Name Your Pop Card/Opt-in field.
Examples:
- Holiday Sale Banner
- Newsletter Signup
- Cart Abandonment Offer
Step 3 — Start Customizing Your Pop Card #
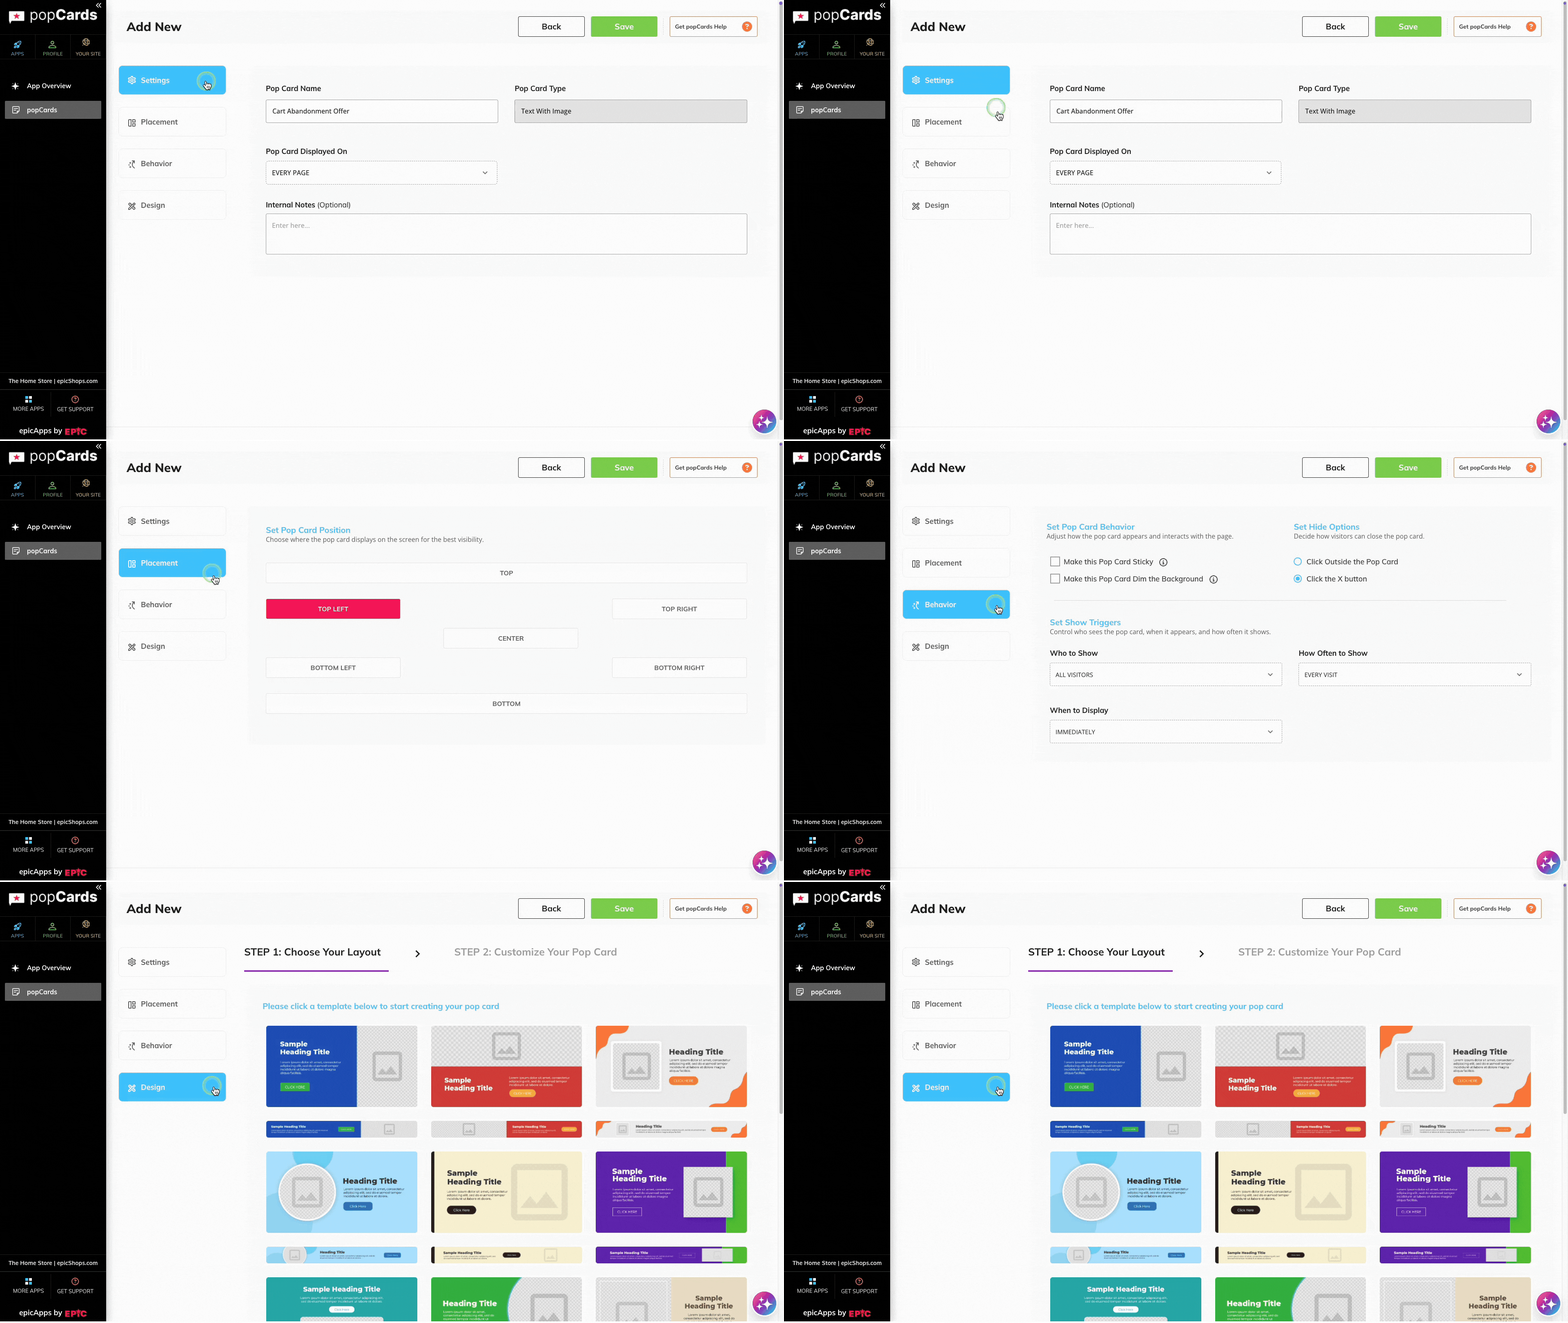
Click Start to open the customization screen.
You’ll see these sections on the left sidebar:
- Settings
- Placement
- Behavior
- Design
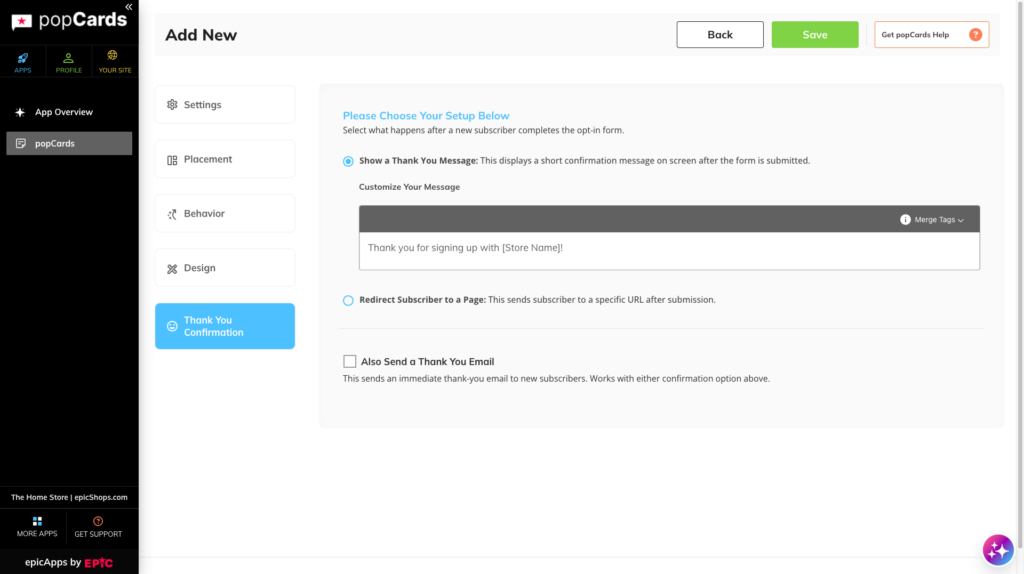
If you selected an Opt-In Pop Card, you’ll also see:
- Thank You
For deeper customization guidance, see:
- Customize Pop Card Settings
- Configure Pop Card Placement
- Configure Pop Card Behavior
- Customize Pop Card Design
- Configure Thank You Confirmation (Opt-In)
Step 4 — Review and Save Your Pop Card #
When you’re happy with your design:
1. Click Save.
2. Review your storefront to confirm the Pop Card appears and behaves as expected.


