Set Up Your Rewards Program #
Now that goLoyalty is installed, configure how and when customers earn rewards.
This walkthrough focuses on the essential steps required before turning your program on.
Step 1 — Set how customers earn rewards #
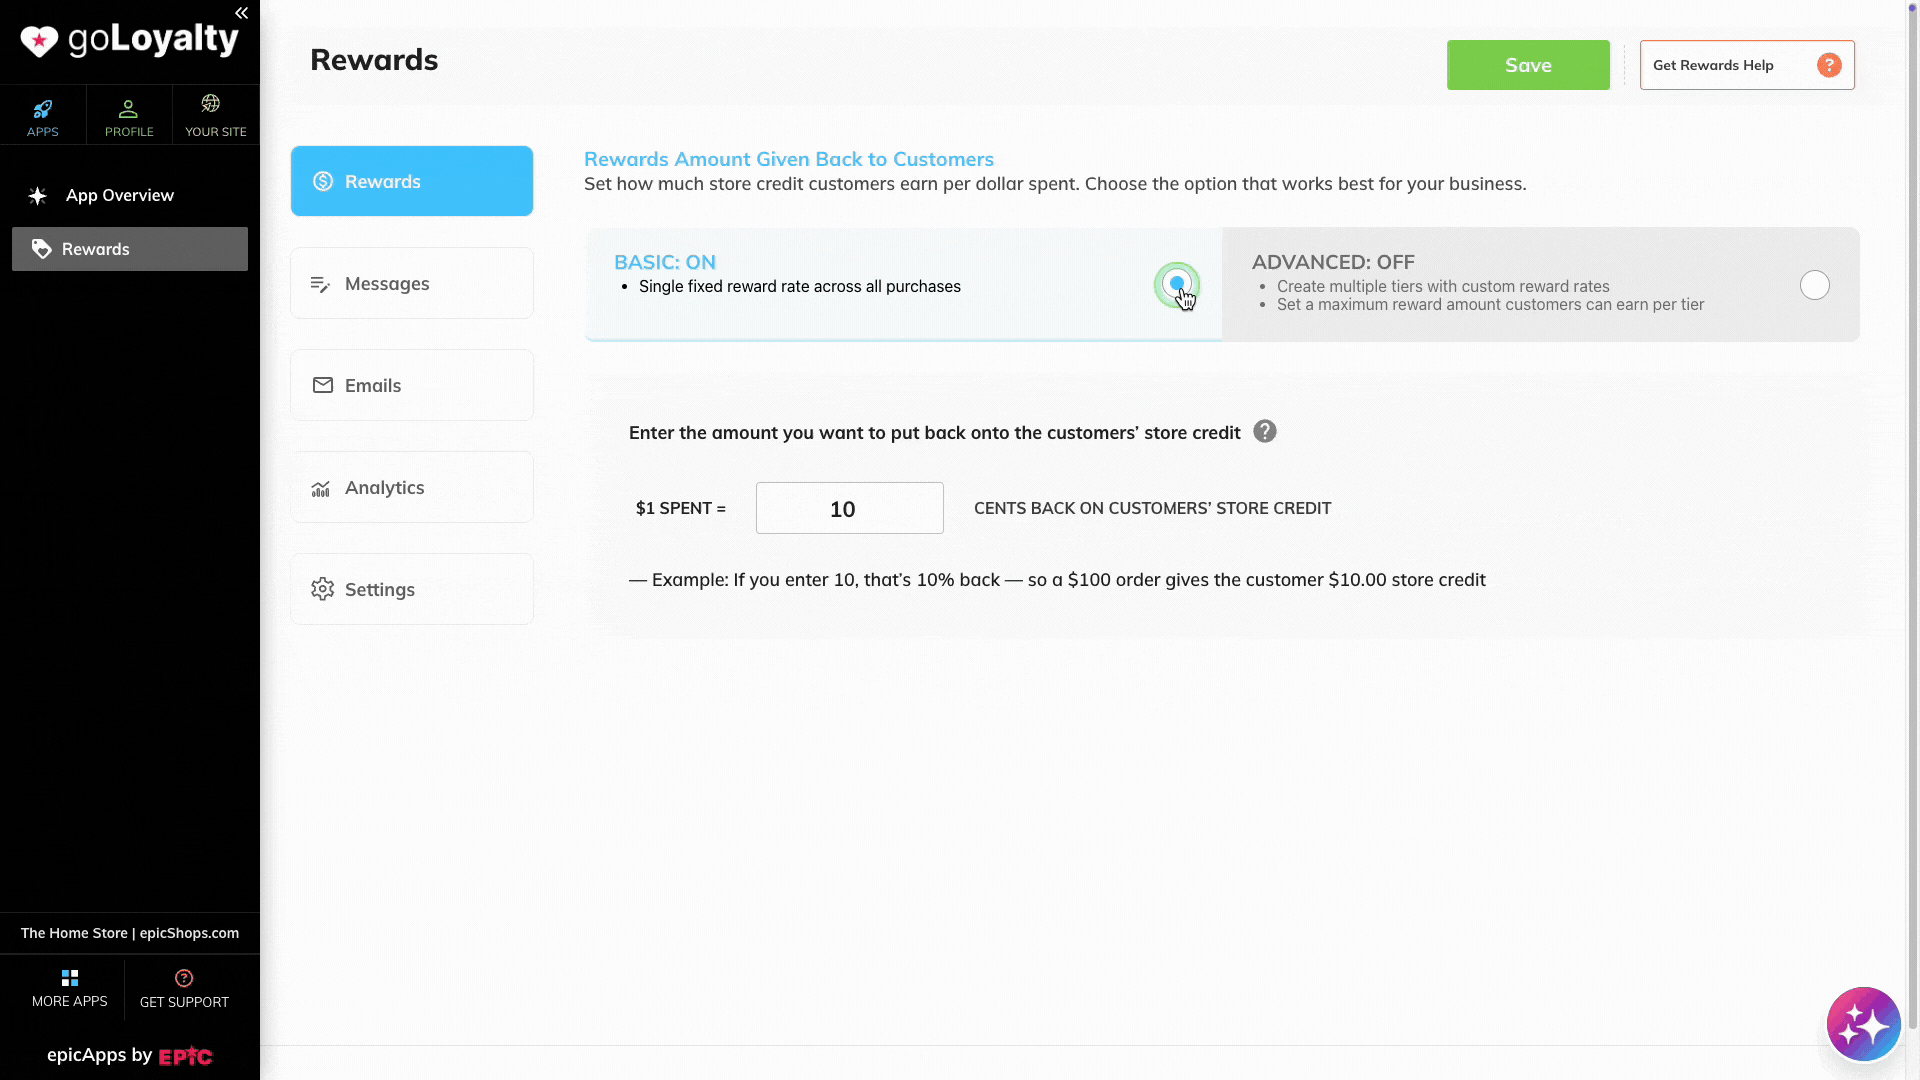
Open the Rewards tab.
Choose how you want rewards to be calculated.
Only one reward method can be active at a time.

Option A — Basic (single fixed rate) #
Use one percentage for every purchase.
1. Select Basic.
2. Enter how much credit customers earn per $1 spent.
3. Click Save.

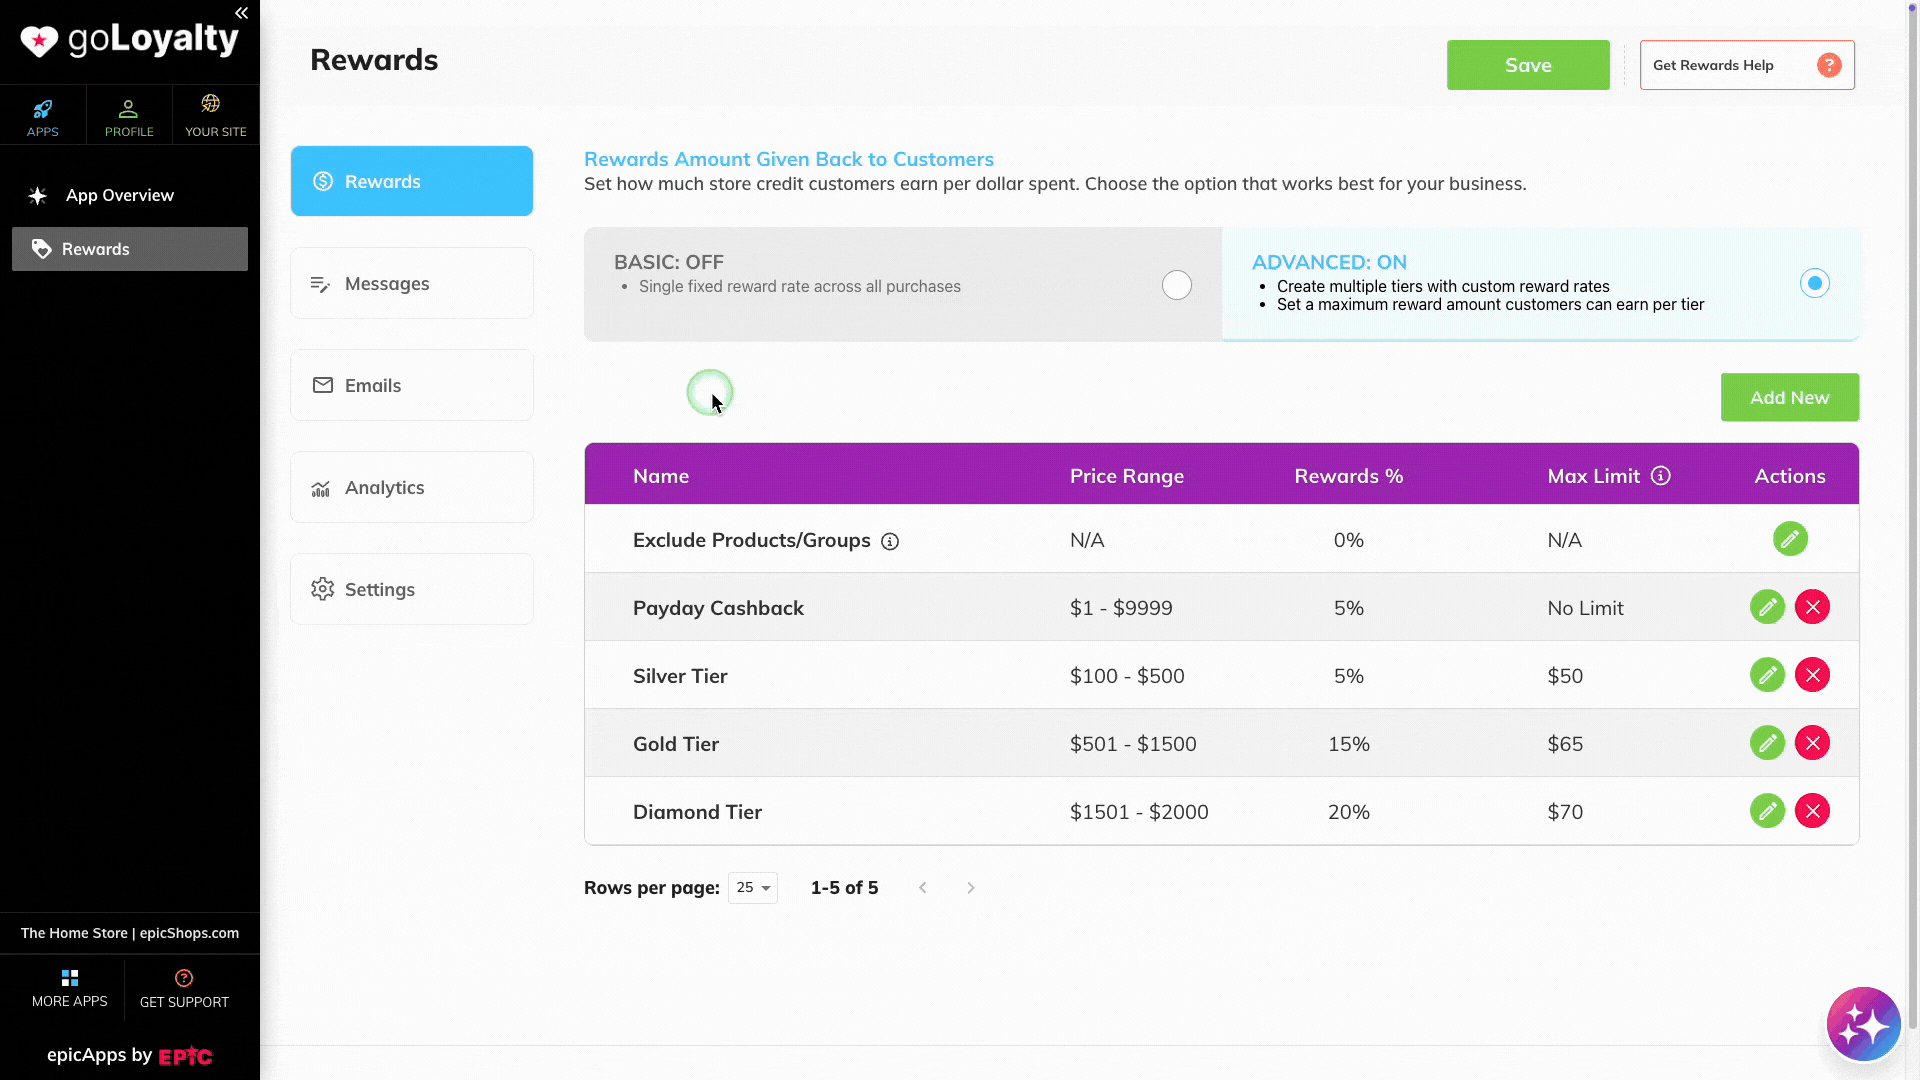
Option B — Advanced (multiple tiers) #
Create different reward rates based on how much a customer spends.
1. Select Advanced.
2. Click Add New.
3. Enter the reward name.
4. Set the minimum and maximum spend range.
5. Enter the percentage customers will earn.
6. (Optional) Set a limit on how much credit can be given back at this level.
7. Click Save.
You can also exclude certain products or customer groups from earning rewards.
For deeper configuration options and strategy ideas, see the Rewards Setup Guide.
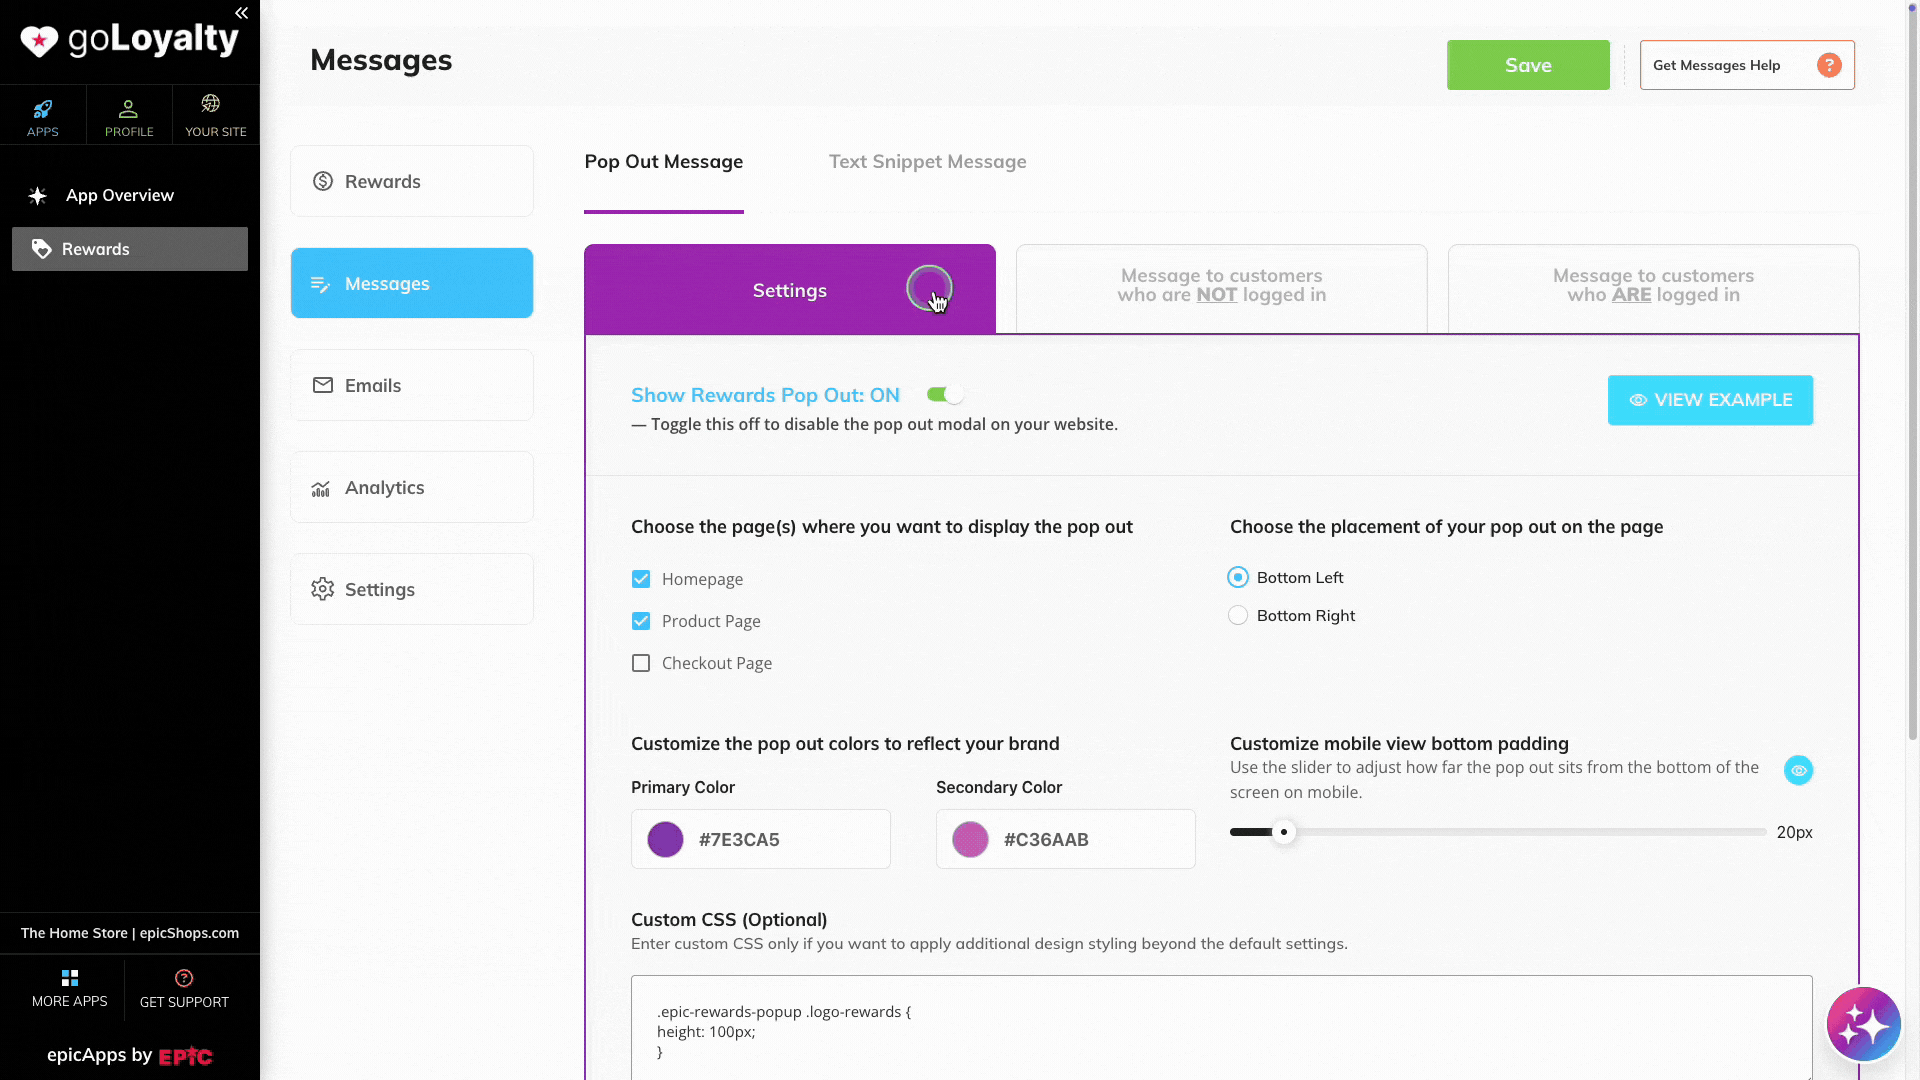
Step 2 — Configure storefront messages #
Open the Messages tab.
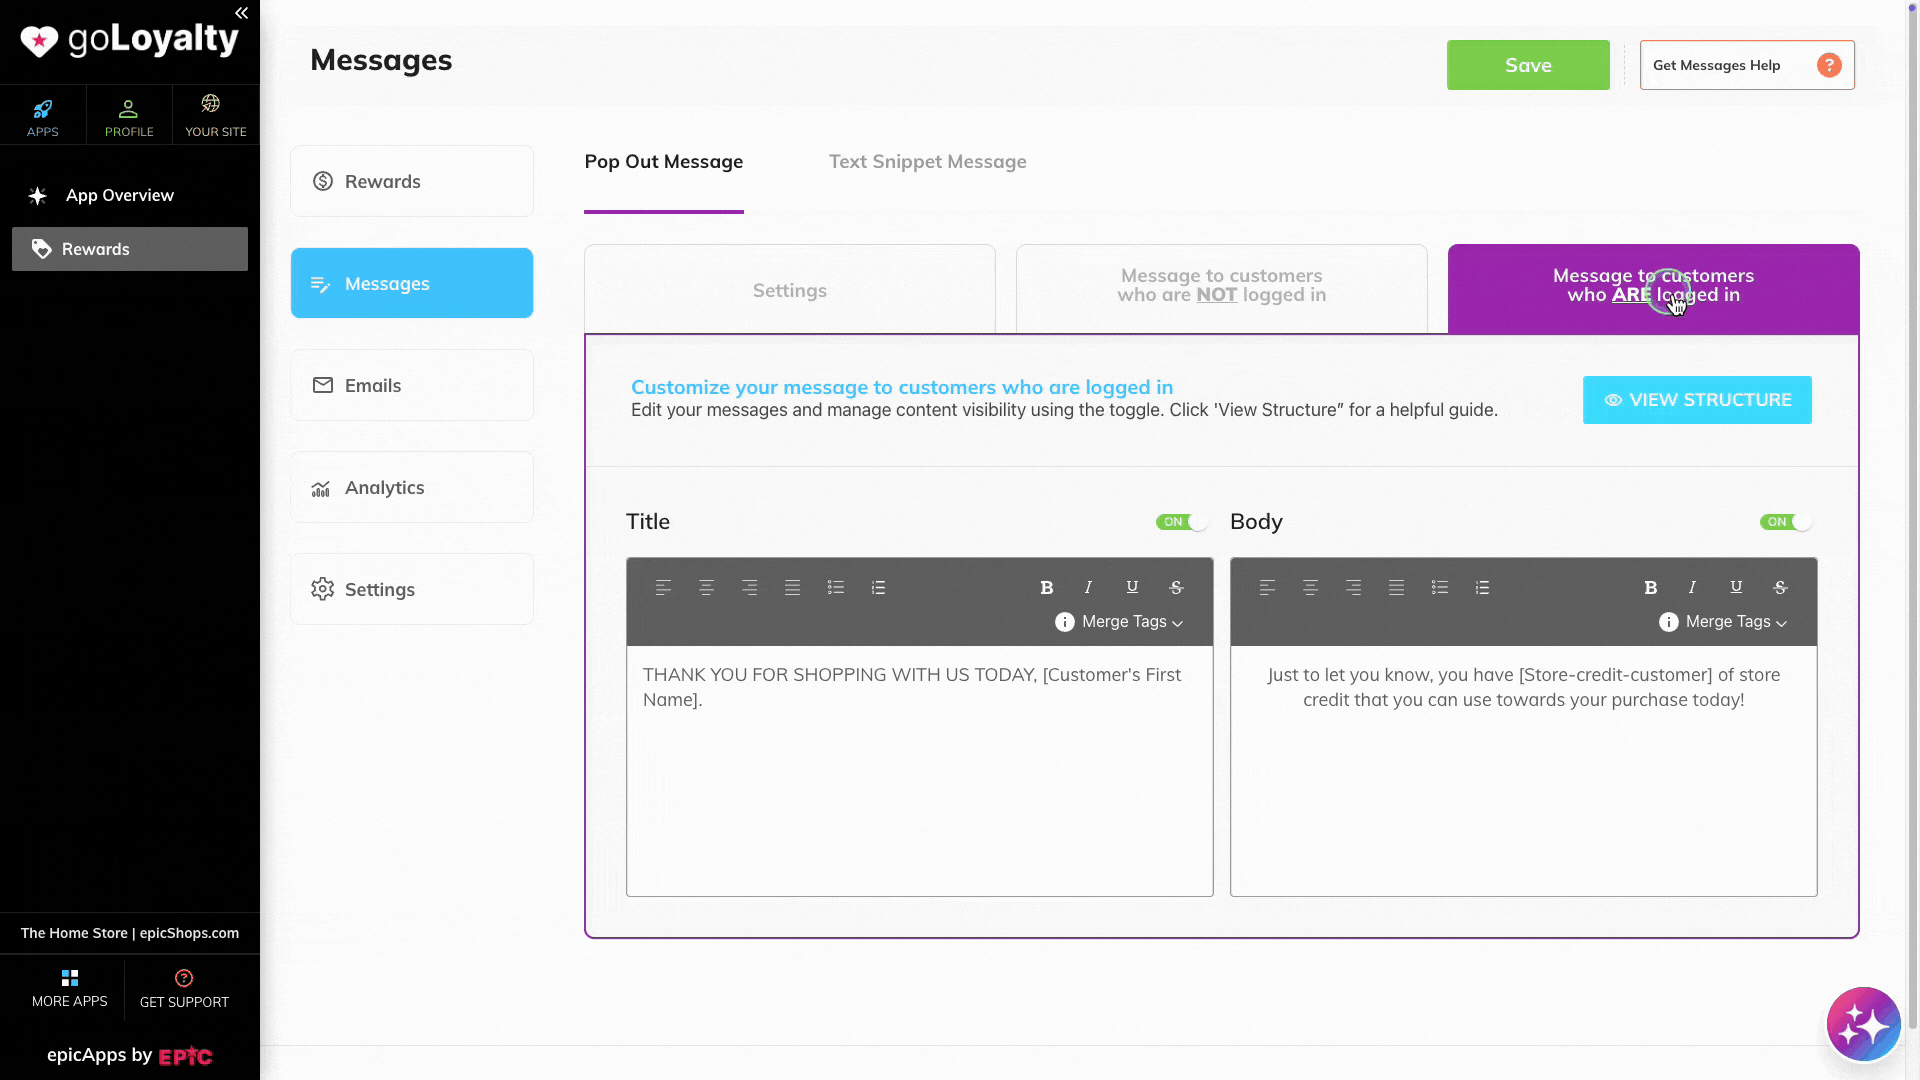
Here, you decide how shoppers will see reward information while browsing your store. Both message types are off by default, so turn on the ones you want to use.
Enable rewards pop-out #
1. Turn on the pop-out.
2. Choose where it should appear (for example, homepage, product pages, or checkout).
3. Choose where the pop-out should appear on the page.
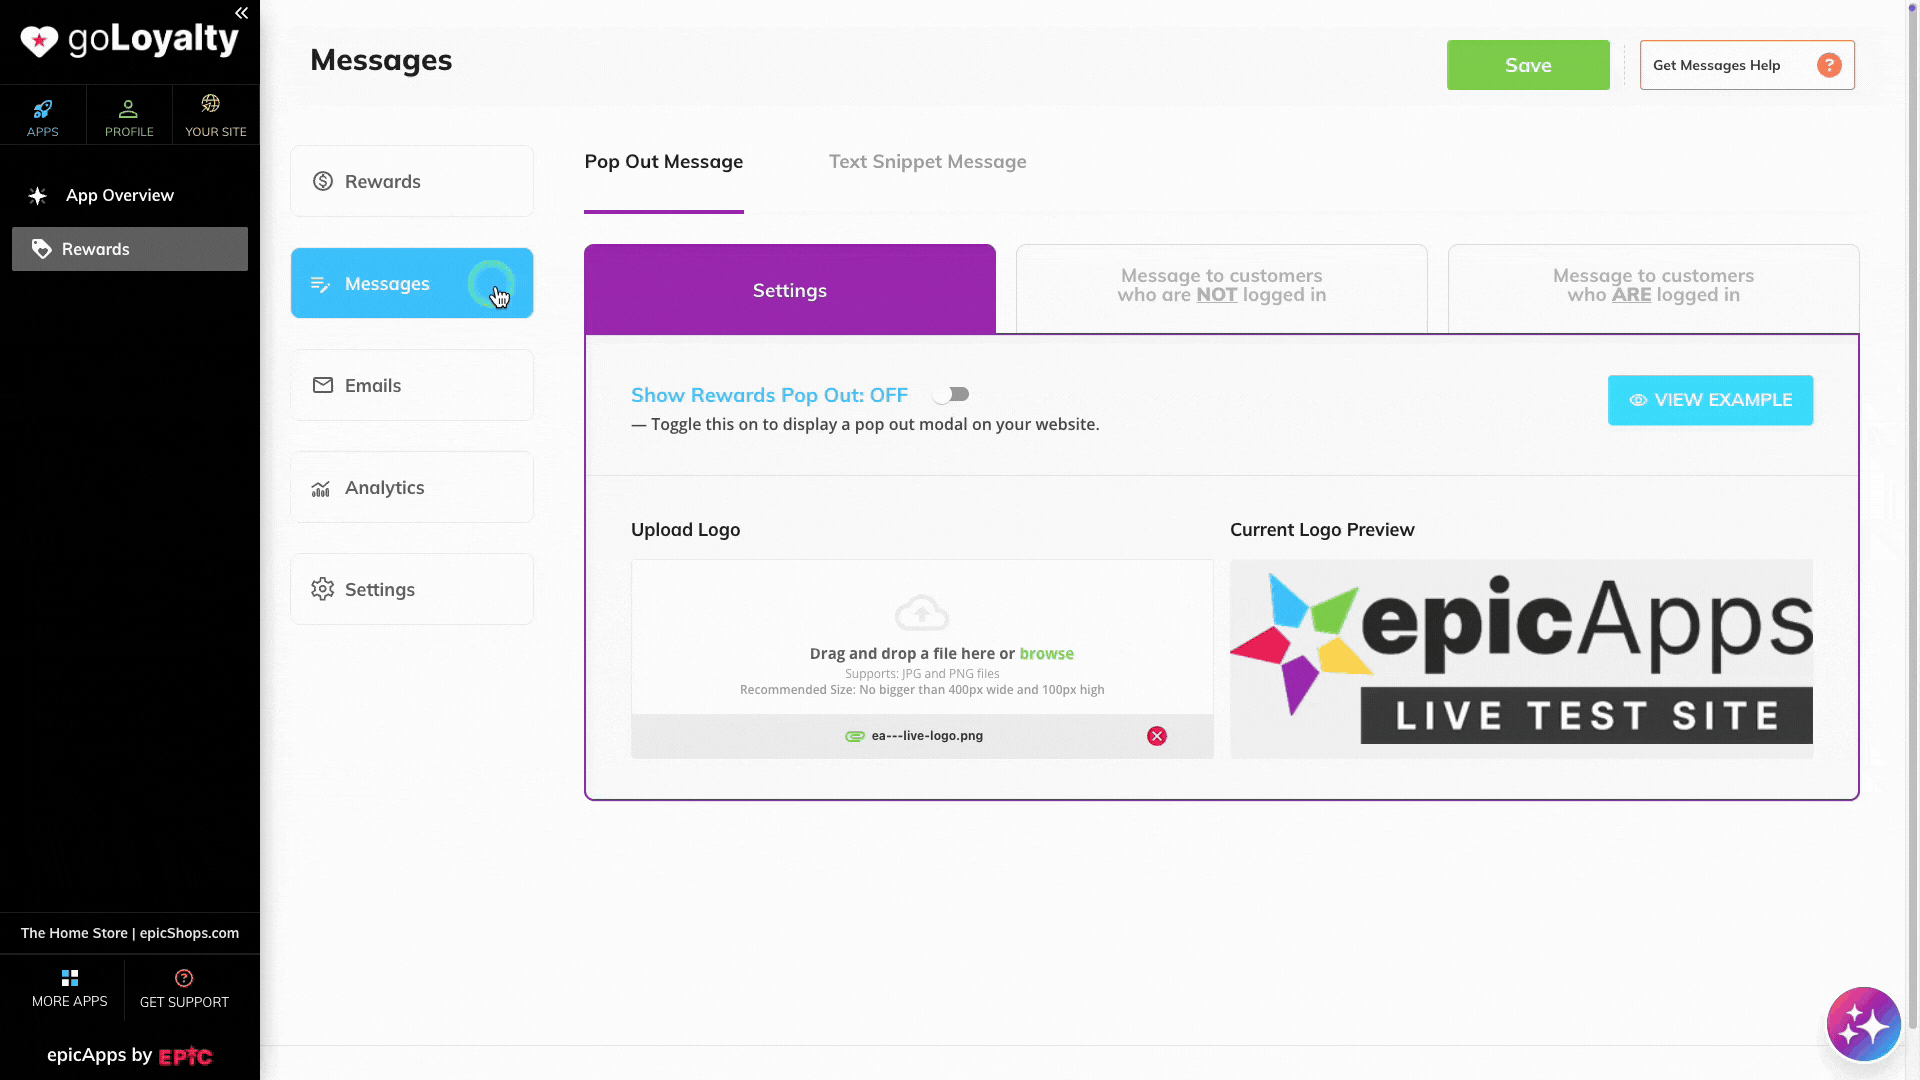
Default content and styling are already provided — you can launch as-is or customize it anytime.
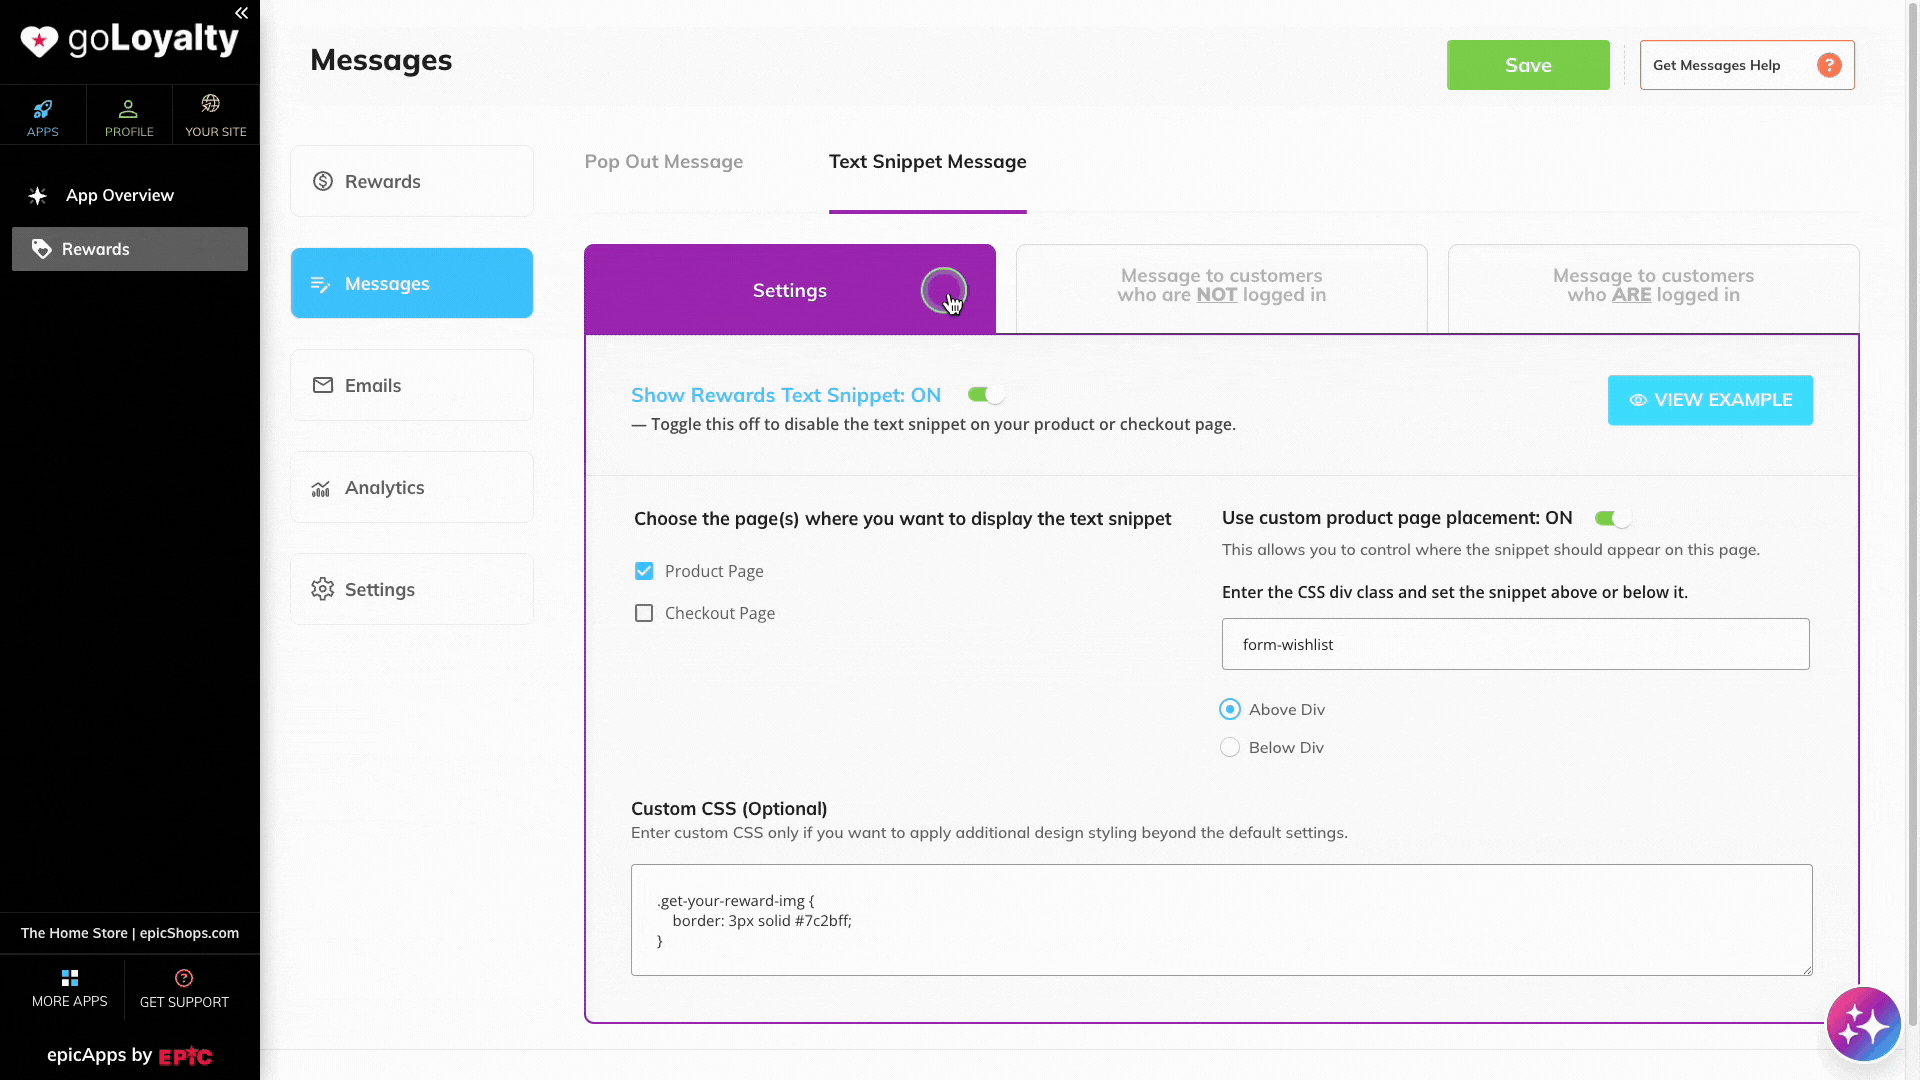
Enable text snippets #
1. Turn on text snippets.
2. Choose where they should appear (product pages or checkout).
Ready-to-use defaults are included.
Want to personalize the design?
You can further customize:
- message content
- Colors
- Logo
- placement and styling
The Messages section also includes separate tabs for customers who are logged in and not logged in.
See the Storefront Messaging Guide for advanced customization options.
Step 3 — Review customer emails #
Open the Emails tab.
goLoyalty automatically sends reward notifications once your program is active.
Two types of emails are included:
- a monthly reminder if customers still have available credit
- an order confirmation email when rewards are earned
Review the templates #
1. Under Store Credit Email, open each email tab (Monthly Email and Order Confirmation Email).
2. Review the content and branding.
Default messages are already prepared, so you can launch without editing.
3. If you make changes, click Save to apply your updates.

Want to customize them?
You can update wording and styling anytime.
For the detailed guide, visit Rewards Emails Guide.
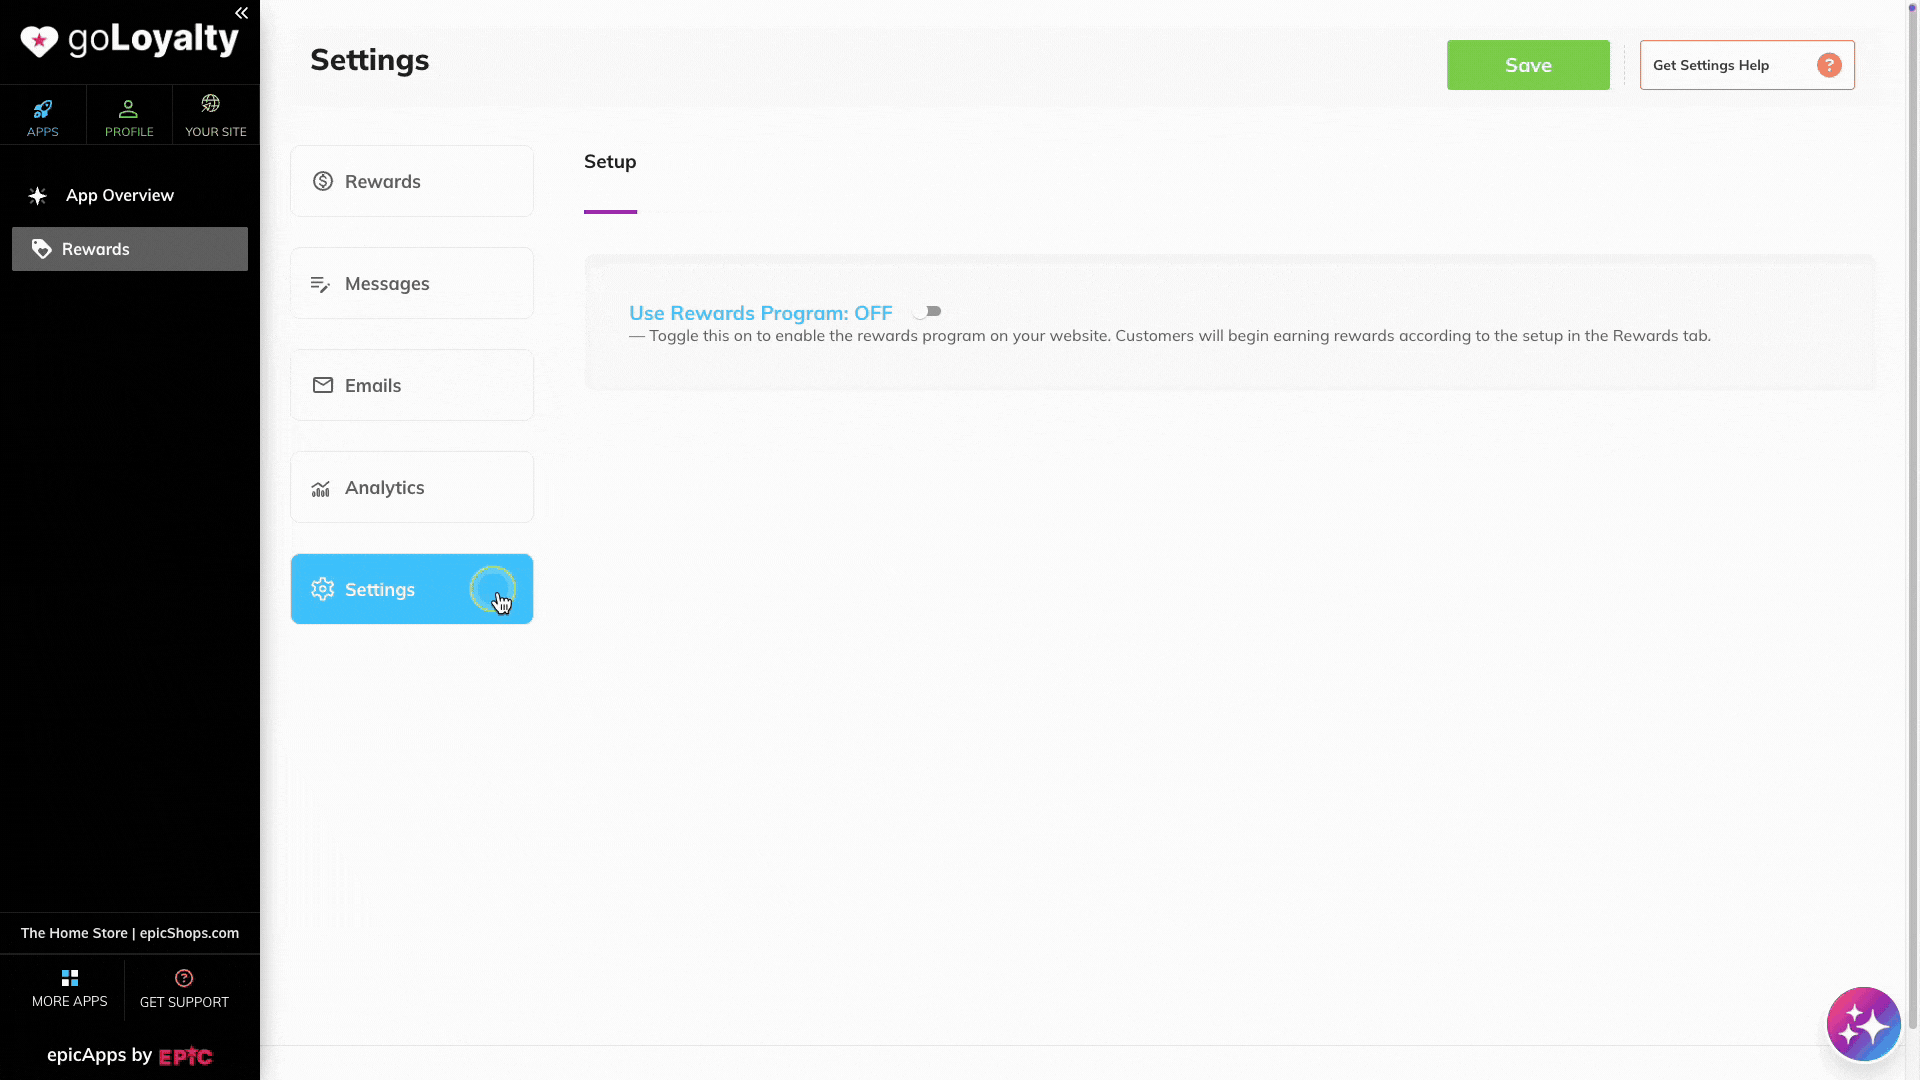
Step 4 — Enable rewards and choose when they are given #
Open the Settings tab.
To start giving rewards, the program needs to be enabled.
1. Switch the rewards program ON.
2. Choose which order status should trigger the reward.
For example, if you select Completed, customers get their credit once the order reaches that status.
3. Click Save.
Your loyalty program is now ready.